


The Everest Three Passes Trek is not the easiest route in the Everest region, but it takes you through more varied terrain than the standard trails. Instead of following the standard path of the Everest Base Camp trek, this route connects three high passes—Kongma La, Cho La, and Renjo La—and takes you through different parts of the Khumbu that many trekkers never see.
It’s not just about reaching Everest Base Camp. Along the way, you also spend time around the Gokyo Lakes, walk through quieter sections of the Khumbu, and pass through villages where daily life still feels rooted in the mountains. The scenery changes constantly, which is part of what makes this high passes trek in Everest unique.
That said, it’s not an effortless journey. The height, the long days on your feet, and the tougher stretches—especially near the passes—make it feel quite hard at times. But if you are prepared for it, the experience feels far more varied and rewarding than sticking to a single route in the Everest region, making the Everest Three High Passes Trek unique.

Key Highlights Of The Trek
- (5,340m) are the backbone of this Everest Trek with Three Passes. Each feels different—rocky climbs, glacier sections, and long, exposed crossings.
- Everest Base Camp and Kala Patthar: You still reach the base camp of Everest (5,364), but the better views come from Kala Patthar (5,545m), where Everest finally opens up in front of you.
- Gokyo Lakes and Valley: The lakes around Gokyo stand out—clear, blue, and set against snow peaks, especially along the Gokyo Valley trek route.
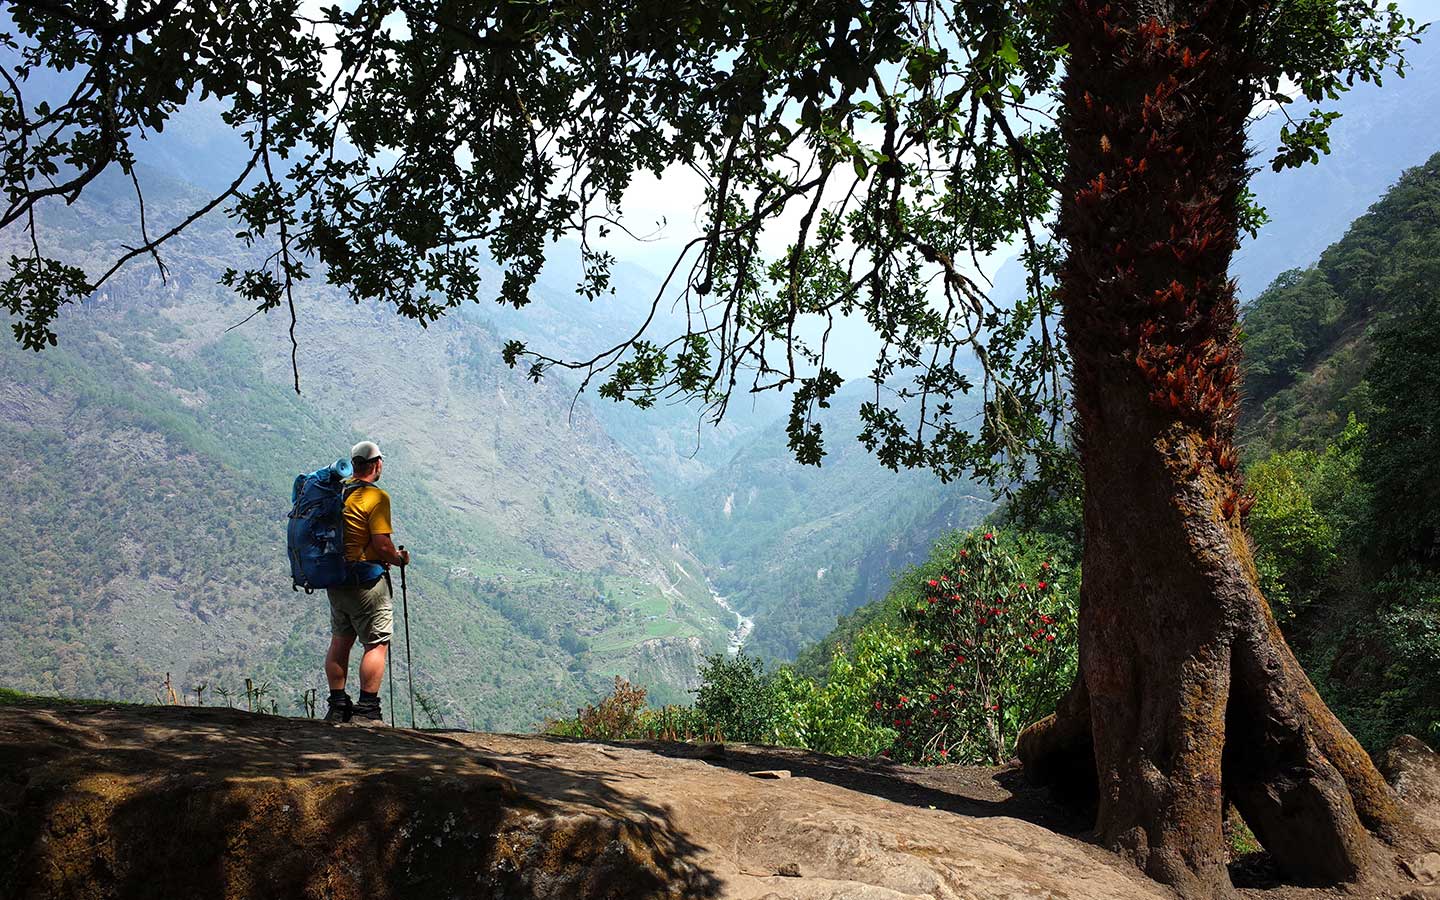
- Changing Landscapes: The trail moves through forests, along rivers, across glacier areas, and into dry, high-altitude valleys. The views keep changing as you walk, so it doesn’t feel the same all the way through.
- Local Culture: The Sherpa people are at the heart of the Khumbu. As you pass through the villages there, you get a sense of how the people live.

Why Trek The Everest Three Passes With Radiant Treks?
- Radiant Treks was founded by Gokarna Khanal after 18 years of working on the Everest trails, from porter to trek leader.
- Most of our guides grew up in the mountains and have spent years leading trekkers across the Everest region.
- We take care of the permits, Lukla flights, and accommodation arrangements before your trek starts.
- No need to carry bulky gear from home. We provide a sleeping bag, a down jacket, and a duffel bag for the trek.
- We love sharing the quieter side of the Khumbu, not just the places everyone else stops at.
- We work closely with local communities and do our part to keep the mountains clean.
- We keep our group sizes small so that you have more flexibility and time to enjoy the journey at your own pace.
- We carry first-aid supplies on every trek, and our team is prepared to assist if problems arise on the trail.
- We have local support in Nepal and a dedicated contact person in Australia to help before your trip.
- What you see is what you pay. No surprise costs along the way.
Everest Three Passes Trek Itinerary
We (a Radiant Treks’ representative) will meet you at Tribhuvan International Airport upon your arrival. Next, we will take you to your hotel. After check-in, we will run through the trek plan. You can keep the rest of the day free to rest or step out for a short walk around Thamel if you feel like it. It’s a light start, mainly to settle in before heading into the mountains for the Everest Three Passes Trek.
We use this day to get everything ready for our upcoming journey into the three passes of the Everest region. For that, we check your permits and go over the gear. It’s also a good time to go through the route of the Everest Three Passes Trek again in detail.
If anything is missing, we can pick it up in Thamel, where there are plenty of trekking shops. Should time permit, you may choose to join our Kathmandu sightseeing tour, which includes visits to sites such as Boudhanath Stupa and Pashupatinath Temple, among others.
Flight Duration: 45 minutes
Elevation Gain: 1,460 m / 4,790 ft
We catch an early flight to Lukla, the trailhead of our journey. During busy seasons, we need to first drive to Ramechhap (Manthali Airport) and fly from there. After landing in Lukla, one of the world’s highest airstrips, we meet our trekking crew and start the trek.
We pass through small villages, walk by prayer wheels, and in the process follow the Dudh Koshi River. There are a few suspension bridges along this way that we need to cross on the Lukla to Phakding trail.
By afternoon, we reach Phakding, a quiet Sherpa village, and we keep the rest of the day relaxed.
Elevation Gain: 830 m / 2,723 ft
The route follows the Dudh Koshi River, and we cross several suspension bridges along the way today as well. This includes the famous Hillary Bridge. The trail passes through small villages and forested sections before the climb begins.
From here, it’s a long uphill walk to Namche. This is where the altitude starts to feel noticeable, so we take it steady. On clear days, there are distant views of Everest. We reach Namche Bazaar by afternoon and settle in for the night.

Elevation Gain: 440 m / 1,443 ft
You will stay here one more day. The fifth day of the Everest three high passes trek is set aside for acclimatization. A short hike above the town, usually towards the Everest View Hotel (3,880 m / 12,729 ft), helps the body adapt. The trail climbs gradually, and on clear days, there are open views of Everest, Lhotse, and Ama Dablam.
After coming back down to Namche, the rest of the day stays relaxed. You can wander through the market, drop by the Sherpa Museum, or just slow down and take it easy for a while. It makes the higher sections a bit easier to deal with.
Elevation Gain: 420 m / 1,378 ft
The trail leaves Namche on the sixth day. We walk along a mostly level path, with clear views of Everest, Lhotse, and Ama Dablam. It then drops through pine and rhododendron forests to the Dudh Koshi, crossing a suspension bridge at Phunki Tenga (around 3,250 m). From here, the day’s main climb begins.
The ascent to Tengboche is steady and can feel tiring, especially at this altitude, but the shaded forest makes it manageable. Near the top, the trees thin out, and Tengboche appears on a ridge, with the monastery set against a wide mountain backdrop.
Elevation Gain: 550 m / 1,804 ft
Today we leave Tengboche with a short downhill walk through pine and rhododendron to the Imja Khola. We cross the bridge and start the steady climb on the other side, passing through Pangboche. Ama Dablam stays right in front for most of the day, with Lhotse and Nuptse further up the valley.
After Pangboche, the trees start to fade, and the ground feels drier and more open. The last stretch to Dingboche is gradual, with stone-walled fields lining parts of the trail. Dingboche sits in a broad, windswept valley and works well as a quiet stop to adjust to the altitude.
Elevation Gain: 650 m / 2,133 ft
Take a bit of time to slow down, enjoy the moment, and get used to the altitude. It is not a full rest day, so we take a short hike to Nangkartshang Hill to gain height safely. The climb starts above the village and gets steep in parts, so it’s best taken slowly.
From higher up, there are clear views of Ama Dablam, Makalu, and Lhotse, along with the Imja Valley below. Some also head towards Nagarjun Hill for similar views. After returning, we keep the rest of the day easy—resting, eating well, and staying hydrated.
Elevation Gain: 320 m / 1,050 ft
It’s a short day, but the altitude is noticeable from the start. From Dingboche, the path follows the Imja Valley, staying fairly gentle and easy to follow. There’s not much tree cover here anymore, just open ground, scattered rocks, and wide views. Island Peak comes into view as you move closer, along with the surrounding glaciers.
The walk itself isn’t difficult, but the thinner air slows things down. Chhukung is a small, quiet place with a few lodges, often used as a stop before heading higher or toward the passes on the Everest three-pass trek.
Elevation Gain: 805 m / 2,641 ft
This is one of the hardest days on the route of the Everest Three Passes Trek. That is why we will try to leave early. The climb from Chhukung is long and steady. Most of the trail is on loose rock, and the elevation is noticeable with every step.
The final push to Kongma La is slow, but the top opens up with wide views of Lhotse, Makalu, and the Khumbu Glacier.
From there, the descent is rough underfoot, crossing broken, rocky ground before linking up with the trail to Lobuche. It takes time and care. Lobuche itself is a small stop near the glacier, with Nuptse rising close by.
Elevation Gain: 424 m / 1,391 ft
The trail from Lobuche follows the edge of the Khumbu Glacier, with rough, rocky ground most of the way. It’s a slow walk to Gorak Shep, where we usually stop briefly before heading on to Everest Base Camp.
The path to Everest Base Camp is uneven. It winds along the glacier, with ice formations and debris all around. At base camp, we are right beside the Khumbu Icefall. Everest is out of direct view but close by. After spending some time there, the walk returns the same way to Gorak Shep, where basic lodges sit in a cold, exposed setting.
Elevation Gain: 365 m / 1,197 ft
We leave Gorak Shep early, while it is still dark, and start the climb to Kala Patthar. It’s not a long distance, but it feels tough because of the steep path and the thin air. From the top, Everest is right there in front, with Nuptse and Pumori close by. As the sun comes up, the light slowly spreads across the peaks.
After spending some time there, we make our way back down to Gorak Shep for breakfast, then set off again on the trail towards Dzongla. It’s quieter here, away from the base camp route, with views of the Khumbu Glacier and rocky slopes. Dzongla is a small place at the base of Cho La, with a few lodges and a quiet feel.
Elevation Gain: 510 m / 1,673 ft
We set out early from Dzongla, heading toward Cho La Pass, the second pass on the Everest three high pass trek route, a section also followed on routes like the Everest Base Camp-Cho La Pass-Gokyo Trek.
The path is rocky at first, then gets steeper as it climbs. Near the top, there’s a short glacier crossing, which can be icy, so you have to watch your footing. From the pass, Ama Dablam and Cholatse are clearly visible.
The descent to Thangnak is equally demanding. This trail crosses loose rocks and some icy stretches before opening into a wider valley. The route then follows along the edge of the Ngozumpa Glacier before reaching Thangnak (also called Dragnag), a small, quiet stop used by trekkers crossing between routes.
Elevation Gain: 50 m / 164 ft
Day fourteen starts with the walk out of Thangnak toward the Ngozumpa Glacier. It is the longest glacier in Nepal. The path here is uneven, with loose rocks and ice beneath, so progress is slow.
Once across, the trail leads towards Gokyo, where the first of the turquoise lakes comes into view. The village sits beside the third lake, with Cho Oyu rising nearby. After reaching Gokyo, it’s a short walk up to the Fourth Lake.
Fewer people go that far, so it feels quieter. The water is clear, and the place feels calm and open. We spend a bit of time there, then make our way back to Gokyo for the night.
Elevation Gain: 607 m / 1,991 ft
We start early for the climb to Gokyo Ri. The path rises straight above the village and feels steep from the beginning, especially at this height. It usually takes a couple of hours to reach the top. From the top, Everest, Cho Oyu, and Makalu are all in view.
Below, the Gokyo Lakes sit clearly, with the Ngozumpa Glacier stretching across the valley. After a while, we head back down to Gokyo. The rest of the day is easy—you can walk around the lakes or just sit by the water.
Elevation Gain: 610 m / 2,001 ft
Day sixteen starts early with the climb up toward Renjo La Pass, a route also followed on the Gokyo-Renjo La Trek. It’s a steady uphill from the start, getting steeper as we get closer to the pass. We will also need to walk through some loose rock and patches of ice along the way.
At the top, the view opens up—Everest, Lhotse, Makalu, and Cho Oyu are all visible, with the Gokyo Lakes far below. The descent is long and can feel tiring on the legs, as it drops into a quieter side of the valley.
Lower down, we pass a few stone huts and yak grazing areas before reaching Lungden. It is a small and quiet stop with very few trekkers around, typical of the quieter side of the high passes trek in Everest.
Elevation Loss: 935 m / 3,067 ft
The trail drops from Lungden into the Thame Valley, following the Bhote Koshi River. It’s mostly downhill and easier underfoot than on the previous days. Thame is a quiet village, and a short stop at the monastery gives a glimpse of local life and Buddhist traditions.
From here, the path continues through small settlements and open sections with views of Thamserku and Kongde Ri. Everest and the bigger peaks are no longer in sight.
Closer to Namche, we start seeing more people on the trail, and the place feels busy again, unlike the quieter higher sections of the Everest trek with three passes.
Elevation Loss: 585 m / 1,919 ft
The final day of the trek follows the familiar trail. It means we walk down the Dudh Koshi Valley. It’s a long descent at first, with stretches through pine forest and several suspension bridges along the river.
The route passes through Monjo and Phakding, where many stop briefly before continuing. The trail has a mix of downhill and short climbs, so it still takes time.
By the time we reach Lukla, we feel as if we have finished the walk. It’s a place to rest, eat well, and take in the end of the trek before flying back to Kathmandu, completing the Everest three pass trek.
After breakfast, we join fellow trekkers for the return. We take a short flight from Lukla to Kathmandu—it gives us one last look at the mountains from above.
On arrival, we transfer you to the hotel and let you relax for the rest of the day. Some choose to rest after the trek. But since we arrived in Kathmandu early, there is an option to head out around Thamel, pick up a few things, or visit the durbar squares of Nepal’s Capital, among other places.
We also organize a farewell dinner—all trekkers gather, share memories, and have fun before the final departure of the Everest three high passes trek.
It is time to say goodbye to your stay in Nepal and your trekking days. You can begin the day with breakfast and some spare time in Kathmandu to step out, take a short walk, or pick up any last things.
It’s a relaxed end to the trip after the long days in the mountains. When it’s time, we take you to the airport for your onward flight. The journey ends here, though the Himalayas tend to stay with you long after you have gone, marking the completion of the Nepal three passes trek.
Trek Cost Details
Cost Includes
- Airport transfers for both arrival and departure in Kathmandu in a private vehicle
- Three nights’ accommodation at a 3-star hotel in Kathmandu
- 16 nights of twin-sharing lodging in teahouses and hotels along the trekking route
- Full-board meals throughout the trek (breakfast, lunch, and dinner), including a serving of seasonal fruit after dinner
- Services of an experienced and professional trekking guide who speaks fluent English
- All guide-related expenses, including salary, equipment, and insurance
- Round-trip domestic flights between Kathmandu (or Manthali) and Lukla
- Road transportation services between Kathmandu and Manthali
- Trekking gear provided for the journey, including a duffel bag, sleeping bag, and down jacket (returnable after the trek)
- Company-branded T-shirt as a souvenir
- First-aid kits carried by the guide to ensure safety on the trail
- Trek completion certificate to commemorate your achievement
- Required trekking permits: Sagarmatha National Park Permit and Khumbu Pasang Lhamu Rural Municipality Entry Permit
- Emergency evacuation services when needed (costs to be covered by the trekker or their travel insurance)
- Printed map of the trekking route for guidance
- All government taxes and official service charges
Cost Excludes
- Porter service available for an extra $320 (one porter shared between two trekkers)
- Travel insurance (it is recommended to have a policy that covers emergency rescue operations)
- Personal expenses during the trek, including hot showers, device charging, and internet/Wi-Fi access
- All beverages, such as tea, coffee, mineral water, soft drinks, and alcoholic drinks
- Additional baggage charges for flights (Lukla flights allow a maximum of 15 kg, including hand luggage)
- Personal trekking equipment and gear
- Tips and gratuities for guides and porters
- Costs arising from unforeseen events or emergencies
- Sightseeing tours or activities in Kathmandu
Essential Info On Everest Three Passes Trek
Trek Overview
The Everest Three High Passes Trek combines many of the region’s most famous destinations into a single route. Along the way, you cross three high mountain passes above 5,000 meters, visit Everest Base Camp, see the Gokyo Lakes, and enjoy views of Everest, Lhotse, Makalu, and Cho Oyu. It also takes you through traditional Sherpa villages, monasteries, and some of the most remote sections of the Khumbu region.
You cross three high mountain passes, namely Kongma La (5,545 m), Cho La (5,420 m), and Renjo La (5,360 m). These passes connect different parts of the Everest region. That is one of the reasons the route is called the Three Passes Trek. Each pass feels different, with unique terrain, scenery, and views along the route.
It covers about 100 to 105 miles (160 to 170 km). However, the total distance of the trek depends on the route you follow, as well as any side trips along the way. Since the trek crosses three high passes and links several valleys, it is longer than the classic Everest Base Camp trek. Most trekkers complete it in around 20 days. This duration provides them enough time to acclimatize properly during the journey.
The highest point you reach during the Everest Three High Passes hike is Kala Patthar (5,545 m / 18,192 ft). Most trekkers make the short climb from Gorak Shep to see Everest and the surrounding peaks up close. Of the three passes, Kongma La (5,535 m / 18,159 ft) is the highest, followed by Cho La and Renjo La.
The Everest Three High Passes Trek is for people who enjoy long days of walking and do not mind a physical challenge at high altitudes. You do not need years of trekking experience to complete it. But if you are fit and prepared for high altitude, then you can find the journey much more enjoyable, even as a beginner. Many trekkers choose this route after visiting Everest Base Camp, though plenty try it as their first major Himalayan trek.
The experience is quite different. While both routes include Everest Base Camp, the Three Passes route is much tougher and longer. EBC sticks to the main, busy Khumbu Valley trail. In contrast, the Three Passes loop feels wildly varied and far more remote. You will explore Gokyo Lakes, cross the massive Ngozumpa Glacier, and conquer the Kongma La, Cho La, and Renjo La passes. Expect much longer daily hikes and significantly more time spent pushing yourself above 5,000 meters.
Most hikers agree it’s the ultimate Everest adventure because it packs every major highlight into one trip. Rather than just walking up one valley to Base Camp and back, this massive loop connects EBC, Gokyo Lakes, and the three major passes. As a result, you get to experience a far richer mix of epic landscapes, remote villages, and stunning mountain views all in one journey.
Best Time & Weather
The weather is not the same throughout the trek. Lower villages like Lukla and Namche stay fairly mild, but as you climb, temperatures drop fast—especially after sunset. By the time you are in Dingboche, Lobuche, Gokyo, or the passes, brace yourself for biting winds, frosty mornings, and freezing sub-zero nights.
Everest Three Passes Trek: Temperature and Weather
| Season | Temperatures & Weather Conditions |
| Spring (March, April, May) | Daytime temperatures at lower elevations are usually between 8°C and 20°C (46°C-68°C). Nights above 4,000 meters often drop below freezing. The weather is generally stable with clear mornings, blooming rhododendrons, and occasional snow on the higher passes early in the season. |
| Autumn (September, October, November) | Daytime temperatures are typically 10°C to 18°C (50°F-64°F) lower down, while nights become increasingly cold at higher elevations. This season is known for clear skies, excellent visibility, dry trails, and some of the most reliable conditions for crossing the high passes. |
| Winter (December, January, February) | Lower elevations usually see daytime temperatures of 5°C to 12°C (41°F-54°F), while higher areas can drop to -15°C (5°F) or lower at night. Expect cold mornings, snow, and ice on the trails and very clear mountain views. |
| Monsoon (June, July, August) | Lower elevations are generally 15°C to 22°C (59°F-72°F) during the day, with cooler temperatures higher up. Rain, clouds, muddy trails, and reduced visibility are common, although the route is much quieter than during peak trekking seasons. |
You generally want to plan your trip for either spring or autumn. Both seasons help you avoid the most extreme weather while offering clear skies and safe paths. A spring hike from March through May means warmer daytime temperatures and colorful rhododendron blooms along the way. If you choose the September to November window instead, the main draw is the visibility. The summer monsoon washes all the dust out of the air, leaving the trails firm and the mountain views absolutely spotless.
You really cannot go wrong with either, though the exact experience varies. Choose autumn for the absolute clearest skies, incredibly sharp mountain views, and highly predictable weather. But be ready to face the foot traffic, since fall is the busiest time in the Everest region. But if you would rather balance good weather with fewer people (compared to autumn) on the route, spring is your best option.
Yes. Fresh snow can easily block your way over Kongma La, Cho La, and Renjo La, particularly in early spring or late autumn. Weather shifts fast at those altitudes, so a sudden storm might delay your progress or make the route much tougher. You will likely encounter some ice up there, even in peak months. Because of these factors, always start your hiking days early and keep a flexible schedule.
Winter trips are very rewarding if you handle the cold well. You get the trails to yourself, empty teahouses, and stunningly clear mountain views. The main challenge is the extreme cold. Temperatures plunge far below freezing around Gokyo, Lobuche, and the passes. You also have to navigate tricky snow and ice during the crossings. With weather this harsh, the winter trek is really best left to seasoned hikers who know exactly what to expect.
You can, but most people avoid it. Between June and August, heavy rain turns the lower trails to mud, and thick clouds constantly block the mountain views. Up on the high passes, wet ground and dense fog make the crossings difficult and unpredictable. While you will definitely avoid the crowds, you are much better off sticking to spring or autumn for a safer, more enjoyable trip.
Route & Itinerary
Most trips start by flying into Lukla, followed by a steady hike up through Phakding, Namche Bazaar, Tengboche, Dingboche, and Chhukung. From there, the trail crosses Kongma La, includes visits to Everest Base Camp and Kala Patthar, then continues over Cho La to Gokyo. Eventually, it crosses Renjo La before returning via Namche to Lukla. Radiant Treks' itinerary takes 20 days to complete this trek, and the schedule includes the acclimatization plan.
Plan on setting aside about three weeks. Our complete itinerary runs for 20 days, covering your arrival and departure in Kathmandu. You will spend 16 of those days out on the trail, which includes essential rest stops at Namche Bazaar, Dingboche, and Gokyo for acclimatization. These breaks give your body time to adapt to the thinning air. Trying to skip them just to finish faster is a terrible idea—it severely increases your risk of altitude sickness right before you hike to the high passes.
We go trekking in an anticlockwise direction, and in our experience, it works really well. After acclimatizing in Dingboche and Chhukung, we cross Kongma La first, then head to Everest Base Camp and Kala Patthar before continuing over Cho La and Renjo La. This route fits naturally with our itinerary. Also, it gives trekkers enough time to adjust to the altitude before tackling the high passes. Both directions are possible, but Radiant Treks has found this route to be the most practical and comfortable for most trekkers.
You definitely can. If bad weather affects the trek or you are running short on time, adjusting the route is easy. At Radiant Treks, we also have the Everest Two Passes Trek package. This covers Cho La, Renjo La, EBC, and Gokyo. It is still a seriously tough and rewarding trip, even if it no longer counts as the complete three-pass circuit.
There is plenty of flexibility built into the route. Extra acclimatization days can be added, side trips can be included, and some trekkers combine the trek with Gokyo Ri, Island Peak, or a helicopter return. Others shorten the itinerary by focusing on selected sections of the route. Any changes should still allow enough time for acclimatization, since altitude usually has a bigger impact than distance in the Everest region.
Difficulty & Fitness
This is a highly strenuous trek. Pushing over three different 5,000-meter passes is seriously challenging, and so is the job of covering long daily distances. Since you rarely hike below 4,000 meters, even gentle uphill sections will leave you breathing hard. An average day requires 5 to 7 hours of hiking, with even longer pushes over the passes. The trek is demanding, but most people who prepare well, give themselves enough time to acclimatize, and avoid rushing can complete it successfully.
While past trekking experience is a bonus, you do not absolutely need it. But one must be in excellent shape and understand the trail's demands. For instance, you must be comfortable hiking for hours day after day, taking on long, steep climbs without rushing. Plenty of beginners finish this route safely. They succeed by keeping a steady pace, taking acclimatization seriously, and coming well-prepared, rather than relying solely on raw physical energy.
Focus on endurance rather than speed. A few months of regular hiking, long walks, stair climbing, and cardio training can make a noticeable difference. If possible, spend time carrying a daypack on uneven terrain rather than training only in a gym. The goal is to get comfortable moving for several hours at a time, since that closely reflects what you'll experience on the trail.
On a typical day, expect to be on the trail for five to seven hours. However, your exact timing will always depend on the weather, trail conditions, and how well you are adjusting to the altitude. The days you actually cross the three passes are the longest and will demand a much bigger time commitment. Remember that higher up, daily mileage means very little. Once you cross the 5,000-meter mark, the thin air completely dictates your pace, making even short distances feel incredibly slow.
Many trekkers find Kongma La (5,535 m) to be the toughest of the three passes. It is the highest crossing on the route; the climb feels long from the start, and there are few places to stop along the way. Days involving Cho La can also be demanding because of snow, ice, or uneven terrain near the glacier section. In general, the pass-crossing days are the most physically demanding part of the trek.
Altitude & Acclimatization
Altitude is a constant factor on this trail. You will spend several days hiking and sleeping above 4,000 meters. The biggest physical tests are the three passes—Kongma La, Cho La, and Renjo La—which all sit well over 5,000 meters. Because you spend so much time in the thin air, even slight uphill sections will leave you breathing hard, making a slow pace and proper acclimatization absolutely vital.
While minor headaches are normal, true altitude sickness feels very much like a severe hangover. You need to watch out for a pounding headache that won't go away with painkillers, extreme nausea, a total loss of appetite, or dizziness. You might also feel completely exhausted just walking across the room. If these hit, you must immediately stop going higher. Resting where you are might help mild cases settle, but if your symptoms get even slightly worse, the only real cure is descending to a lower elevation until you recover.
Almost everyone feels the altitude after passing through Namche Bazaar. Mild headaches and disrupted sleep are entirely normal above 4,000 meters. To stop those from becoming real sicknesses, you have to walk slowly. Drink three to four liters of water daily, even when it's freezing. Stick strictly to the "climb high, sleep low" rule on rest days. Also, consider bringing Diamox. Most importantly, you should never hide a worsening headache or other symptoms—if these symptoms progress, taking immediate suitable action is essential.
They are definitely not full rest days. You will spend your mornings doing a short but steep hike up to a higher viewpoint—like climbing Gokyo Ri, Nangkartshang Hill, or pushing toward the Everest View Hotel. Spending a few hours gaining that extra elevation safely forces your body to adapt. Then you descend back to your village. The entire afternoon remains incredibly easy, focusing strictly on resting, exploring the local area, eating well, and staying hydrated.
You will sleep at spots like Gorak Shep (5,164 m), Lobuche (4,940 m), and Gokyo (4,790 m), and they will definitely test your lungs overnight. However, the biggest challenge isn't any single steep climb. It is the compounding fatigue of being in the thin air for days. By the time you actually start crossing the three passes, that cumulative exhaustion has built up, making even a standard, flat section of trail feel draining.
Helicopter evacuation is available throughout much of the Everest region and is often the fastest option when serious altitude-related illnesses or injuries occur. Weather conditions can sometimes affect flight availability, but rescue helicopters regularly operate in the Khumbu.
Transportation & Lukla Flights
You can fly straight into Lukla Airport. If you go during the quieter months, you can usually catch a direct 40-minute flight from Kathmandu. During the peak spring and autumn seasons, however, most flights are routed to Ramechhap. This requires taking a very early morning drive from Kathmandu just to catch your plane to Lukla at Manthali Airport in Ramechhap. Keep in mind that mountain weather dictates everything, so flight delays and sudden schedule changes are common.
If you really want to skip the early morning drive to Ramechhap, your easiest option is to opt for the Everest Three Passes Trek during the off-season. When the trails are quiet, flights usually leave directly from Kathmandu. If you want to trek in peak season, there is the alternative of paying a premium for a direct helicopter flight.
Absolutely. While our standard Three Passes itinerary starts with the quick flight into Lukla, it is entirely possible to skip the airport hassle. You can take a jeep to lower trailheads like Jiri or Salleri and hike your way up instead. This will add a few extra days to your total trip, but it removes the stress of weather delays and gives your body a much slower, natural progression into the high altitude. If you prefer this overland approach, just let us know—we are always delighted to customize your itinerary to fit exactly how you want to travel.
Lukla flight delays are a completely normal part of the Everest trek. Wind, clouds, or poor visibility can easily ground Lukla flights for hours or even days. Most people just hang out and wait for the next open plane. If your schedule is too tight, you might have the option to charter a helicopter instead, though availability is never guaranteed, and the extra cost can be steep.
Keeping at least one or two extra days at the end of your trip is a good idea. Flights to and from Lukla are heavily dependent on weather, and delays can happen in any season. Having a buffer means a cancelled flight is less likely to affect your international travel plans. Many experienced trekkers treat these extra days as part of the itinerary rather than an optional addition.
Baggage limits depend slightly on the airline, but you generally get around 15 kg (33 lbs) total to share between your checked bag and daypack. If you pack heavier, you will face extra weight fees—and on busy days, airlines might even leave overweight bags behind. Packing light is the easiest way to avoid airport stress.
Permits & Regulations
Two permits are required for the Everest Three High Passes Trek. The Sagarmatha National Park Entry Permit is needed to enter the national park area, where most of the trek takes place. The second is the Khumbu Pasang Lhamu Rural Municipality Permit, which replaced the old TIMS card for trekkers in the Everest region. Both permits are checked at various points along the route.
The Sagarmatha National Park permit is 3,000 NPR (about USD 23) plus a small tax, and the local Khumbu permit is another 2,000 NPR (around USD 15). That money actually goes right back into maintaining the trails and supporting the local community. Just keep in mind that the government occasionally tweaks these prices, so it is a good idea to double-check the latest rates right before you fly out.
You can obtain these permits in Kathmandu before flying out or pick them up at the Lukla and Monjo checkpoints along the way. You must keep them with you at all times, as rangers will check them at multiple locations. If you trek with Radiant Treks, we handle all paperwork as part of your package.
Yes, your nationality definitely changes what you pay. International trekkers are charged the full rate, while SAARC nationals and Nepali citizens get a significant discount for the national park entry. Since these fees are set by the government and can shift, you don’t need to worry about the cost calculations. If you are trekking with us, we will handle all the permits and let you know exactly what’s required when you book your trip.
Accommodation & Facilities
You will be staying in local teahouses along the way. They are simple mountain lodges offering trekkers a place to sleep and eat. Villages such as Lukla and Namche are known for providing more comforts as compared to the villages at higher altitudes. When you stay in remote spots like Lobuche or Dzongla, expect basic accommodations, though they remain perfectly functional for your needs.
Expect a basic setup—usually, you will get a small, unheated room with twin beds. While the lodges provide a mattress, a pillow, and a blanket, they aren’t insulated against the freezing mountain temperatures. Because the rooms at higher elevations can get quite cold at night, you will definitely want to pack a warm sleeping bag to stay comfortable, regardless of what the lodge provides.
They may differ from one village to another. You will usually be sharing bathroom facilities with other guests at teahouses. Meanwhile, places like Lukla and Namche sometimes offer rooms with private bathrooms. You'll find a mix of Western and squat toilets along the trail. Higher up, things get a bit more basic, which is simply part of trekking in the Everest region. They may not be fancy, but they are usually decent enough for a night's stay.
Hot showers are available in many teahouses, although they almost always come with an extra charge. The higher you go, the more limited hot water becomes. Laundry services can be found in some lower villages, particularly Namche Bazaar, but they are less common at higher elevations. The best move is to wash small items by hand when conditions allow. You can save larger laundry loads for after the trek.
It depends on your location during the Everest Three High Passes Trek. For instance, you can charge your devices at most teahouses, but you need to pay an extra amount. That is because electricity is a limited commodity in the mountains. While mobile service is decent around Lukla and Namche, it gets spotty and unreliable the deeper you trek. You will find Wi-Fi in many villages, but don't count on it; speeds are often frustratingly slow and prone to dropping out, particularly during poor weather or in remote locations.
Food & Drinking Water
Dal bhat is the most common choice, followed by noodles, fried rice, soups, potatoes, pasta, and momo. Breakfast often includes porridge, eggs, Tibetan bread, pancakes, or muesli. As you gain altitude, menus become shorter since all supplies have to be carried into the mountains. Overall, the food is generally hearty, nutritious, and quite similar from one village to the next.
Honestly, yes, it’s easily your safest bet. Because it's the local staple, teahouses are constantly cooking up fresh batches, so you aren't stuck eating something that’s been sitting out or reheated. It’s a simple, reliable mix of rice, lentils, and veggies that's gentle on your stomach. Plus, it’s precisely the kind of fuel you need to keep your energy up for those long, brutal days of trekking.
You won’t have trouble as a vegetarian; most teahouses serve dal bhat, noodles, rice, soup, and potatoes. Vegan choices exist, though the menu becomes limited as you trek higher. If you have severe allergies or specific dietary needs, tell us early. Remote villages have fewer supplies, so expect to be flexible with your meals.
Treating your water is the easiest way to avoid buying plastic bottles on the trek. Many trekkers carry a filter, purification tablets, or a UV purifier and simply refill their bottles at teahouses along the route. Boiled water is also available in most lodges for a small charge. Bottled water can be found in many villages, but the price climbs quickly as you go higher, and carrying all those plastic bottles into the mountains creates unnecessary waste.
Small shops and teahouses sell snacks, soft drinks, chocolate bars, instant noodles, toiletries, and basic trekking supplies throughout much of the route. Prices rise steadily with altitude because everything has to be transported into the region. You can also stock up on favorite snacks in Kathmandu, Lukla, or Namche Bazaar, where both selection and prices tend to be better than in the higher villages.
Staying healthy at altitude really depends on being careful with what you eat and drink. Stick to fresh, hot meals and stay away from meat once you are higher up. That is because it is carried from lower elevations, and there is often no reliable means of preservation. Always treat your water, wash your hands whenever you get the chance, and keep hand sanitizer handy. Likewise, eating regular meals and drinking plenty of water are also essential to help your body handle the climb.
Packing & Gear
Don't pack your whole closet; focus on layers. You will want moisture-wicking base layers, a few trekking shirts, a fleece, a down jacket, and a reliable waterproof shell for those sudden storms. For gear, a sleeping bag rated for cold nights, trekking poles, sunglasses, a headlamp, and reusable water bottles are the basics. The weather can shift quickly once you are above 4,000 meters, so it's best to be ready for bright sunshine, strong winds, and freezing temperatures on the same day.
You need sturdy, well-broken-in boots with good ankle support and a reliable grip. You will be walking across everything from loose rock to steep, icy passes. So, stability is non-negotiable. Waterproof shoes are a must for higher elevations where snow is common. Finally, don't forget to pack a pair of lightweight shoes or sandals—your feet will thank you once you are off the trail and relaxing in the teahouse at night.
For most spring and autumn departures, regular trekking boots are enough. That said, snow and ice can linger on the Kongma La, Cho La, and Renjo La, especially early in the season or after a storm. So, it is smart to bring lightweight microspikes for these sections. They are much easier to manage than full crampons and offer excellent grip when things get slippery. Your guide will let you know if additional traction devices are necessary when you are on the trail.
A comfortable daypack with a capacity of 25-35 liters is usually enough to carry water, extra layers, snacks, and other essentials you will want easy access to during the day. The rest of the gear usually goes into a duffel bag carried by a porter. If you are trekking with Radiant Treks, we provide you with a duffel bag. Keeping the daypack light makes a noticeable difference once you start gaining altitude.
Absolutely. Thamel in Kathmandu is packed with shops where you can rent or buy just about anything—sleeping bags, down jackets, and poles, among others. Many people prefer renting the big, bulky stuff to save space. Just make sure you bring your own well-broken-in boots and any specific personal gear you already trust and love. For a trek this long, you want to be certain your most important items fit perfectly.
The biggest mistake is overpacking clothes. You will wear the same base layers every day, so just bring one fresh set for the evenings. Think in layers rather than outfits. Opt for lighter gear, leave the extra electronics at home, and let a porter handle the bulk in a duffel bag. If your trekking company provides a sleeping bag or down jacket, definitely take them up on that—it’s the fastest way to save space and weight.
Guide & Porter
It comes down to who is doing what on the trail. A guide is your dedicated professional for safety, health, and finding the way. A porter strictly handles your heavy gear, leaving you with just a light daypack. A porter-guide is one person doing both jobs. Basically, they handle your gear while also helping you find your way and managing the day-to-day. It’s a popular, budget-friendly option if you are okay with someone taking on two roles on the trail.
You can go solo, but most people hire a guide. The Three Passes are remote, the weather is unpredictable, and finding your way through the high mountain passes is no small task. As for a porter, it’s also optional—but dropping your heavy gear for a lighter daypack makes a massive difference when the thin air starts hitting your lungs. If you want to focus on the views instead of the logistics and heavy lifting, hiring support is the way to go.
Most people trekking in the Everest region spend around USD 20-30 a day on a porter and about USD 30-50 a day on a guide. The actual rate often depends on who you hire and when you trek. A guide who has spent years working in the Khumbu, for example, may charge more than someone newer to the job. Likewise, finding staff during the busiest weeks of spring or autumn can be a little pricier. If you trek with Radiant Treks, the main package already covers the guide cost.
You need someone who is fully licensed, knows these trails by heart, and understands high-altitude safety better than anyone. Always confirm they are insured and trained in first aid. A top-tier guide does way more than point out the path; they manage your daily pace, watch your health, and stay ready to make smart calls if the weather shifts. Check recent feedback (if available) to make sure they are the right fit for your trek.
Cost & Budget
The final price really depends on how you structure the trip, the size of your group, and what’s included in your package. If you join one of our group treks, the rate is USD 1,550 per person. Keep in mind that the price doesn’t cover everything; you should also set aside extra cash for your flights, travel insurance, and daily pocket money for snacks, gear, battery charging, or any extra drinks you want along the way.
By the time the trek starts, we have already handled most of the practical arrangements. The package covers your teahouse stays along the route as well as trekking permits and a guide. It also includes airport pick-ups and drop-offs. We also provide a duffel bag for your gear. Once you are in Kathmandu, there is very little paperwork or planning left for you to worry about.
Most trek packages cover the basics, but you’ll need to set aside extra cash for a few things. International flights, visas, and specialized travel insurance are almost always on you. You'll also need to bring your gear. Once you are trekking, little things like hot showers, Wi-Fi, charging gadgets, and extra drinks or snacks add up fast. Don't forget to tip your crew—and always carry plenty of cash, as ATMs disappear once you’re up high.
Set aside about 2,000 to 4,000 NPR (roughly USD 15-25) per day for your spending. This comfortably covers daily extras like Wi-Fi, battery charging, hot showers, snacks, and the occasional drink. Keep in mind that prices climb along with the altitude, so your final total really depends on how many small luxuries you go for. It’s better to be slightly over-prepared than to run short mid-trek.
You'll find ATMs in Lukla and Namche Bazaar. However, they should not be relied upon, as machines occasionally run out of cash or stop working because of connectivity issues. Card payments are accepted in some larger lodges and shops, although service fees are common and connections can be unreliable. Once you move beyond Namche, carrying enough cash becomes far more important than depending on electronic payment methods.
Travel Insurance
You do not need travel insurance to obtain permits for the Everest Three High Passes Trek, but most trekkers carry it for good reason. Once you are deep in the Khumbu, getting help is neither simple nor cheap. If altitude sickness, an injury, or bad weather forces you off the trail, a helicopter evacuation can cost thousands of dollars. Having insurance that covers high-altitude trekking and emergency rescue can save a lot of stress when things do not go according to plan.
It needs to cover trekking at the highest elevations reached during the trek. Confirm that it covers high-altitude activities. It should extend to at least 6,000 meters since the trek crosses several passes above 5,000 meters. Emergency helicopter evacuation and medical treatment should be included as standard. Many policies cover trekking but exclude high-altitude rescue, so it is worth reading the fine print carefully rather than relying on the headline coverage.
Tell your guide as soon as you can. They are experts in handling high-altitude issues. In addition, they are the ones who will initiate the evacuation process. They will also call your insurance and our office to sort out the helicopter. Since mountain weather changes fast, just stay calm and wait in a safe, easy-to-reach spot while we transport you to a Kathmandu hospital.
Group Size, Family & Suitability
There is no such rigid age limit, but this hike is typically best for healthy adults. It means you will need good cardiovascular fitness. Add to that the mental grit to handle long and demanding days on the trail. If you are older and have plenty of high-altitude experience, you can definitely make it happen. However, please check with your doctor first to make sure you are ready for the physical toll and thin air of the Khumbu.
Active teens who love a challenge often do exceptionally well on this trek. But because this route is demanding, it’s best if they already have hiking experience. As a parent, just make sure they are physically and mentally prepared for the rigors of high altitude. It’s also smart to keep your itinerary flexible and stay in close contact with your guide to monitor how your teenager is feeling every step of the way.
Radiant Treks runs small and intimate groups of around two to eight trekkers. Smaller groups allow for more personalized attention from your guide and greater flexibility with the pace. Joining a group is a fantastic way to meet fellow hikers from around the world. We carefully manage our numbers to ensure every member receives high-quality safety oversight, making the experience more relaxed, social, and manageable while navigating the high mountain passes.
Health & Safety
Local clinics in the small villages can only handle basic problems like blisters or a stomach bug. If you are dealing with a serious injury or altitude sickness, our guides have first-aid kits and oxygen on hand to stabilize you. Should you need urgent medical care for a serious condition, please rest assured that we will arrange a helicopter evacuation to Kathmandu immediately.
We take your safety seriously; every guide is fully certified in first aid and high-altitude rescue. If a crisis hits, they will get into action to stabilize you while radioing our office to set up an evacuation. They will also track the weather to see if a heli-rescue is safe to launch. From start to finish, your guide’s only focus is keeping you secure until the professionals take over.
The Everest region is widely regarded as very safe for women traveling alone. The trails are busy, and the local teahouse culture is both welcoming and respectful. Many women choose to hire a guide—it’s particularly beneficial for companionship and handling logistics. Plus, it adds an extra layer of comfort and local support. Whether you join a group or go solo, you will find the Khumbu is an incredibly supportive place to trek.
Culture & Responsible Trekking
The Sherpas are the indigenous mountain people whose life revolves around Buddhist traditions. This can be reflected in the prayer flags fluttering along the trails and the stone mani walls etched with mantras. You need to walk with these mani walls on your left and in a clockwise direction. In addition, the Sherpa people are friendly and practical. It is not difficult to strike up a conversation with them. Meanwhile, a genuine "Namaste" is the best way to show that you appreciate their hospitality as you move through their villages.
Treat these places with the same respect as any house of worship and follow the locals' lead. Take off your hat and leave your pack outside before you head in. And keep your voice low to match the quiet atmosphere. Avoid touching any of the statues, paintings, or altars. If there’s a service going on, just watch from the back rather than cutting through. Always check with a local monk before entering into any inner prayer rooms, as some spots are reserved for private practice.
It is absolutely fine. You will come across plenty of beautiful scenery, villages, monasteries, and local life along the trail—don't hesitate to take photos and videos of them. But when photographing local people, a little courtesy goes a long way—ask first before featuring them. Most people are happy to oblige. But you must not take photos or videos of funerals, prayers, or other religious ceremonies. Take permission beforehand if you want to record them.
You are already helping out the locals through your action by staying in family-run teahouses and eating local favorites like dal bhat. To do even more, try picking up your snacks or souvenirs from small village shops instead of packing everything in your bag. Also, be sure to book with a trekking company that pays their guides and porters fairly—it’s the best way to make sure your trip truly supports the families who live up there.
The biggest thing is cutting out plastic—just bring a reusable bottle and a filter or some tablets. Whatever trash you bring in, like candy wrappers or dead batteries, take it back down with you instead of dumping it in local bins. Also, stick to the main paths to avoid trampling the plants, and just follow the "leave no trace" rules so the Khumbu stays beautiful for the next person.
Extensions & Customization
Yes, it is possible. You can totally pair the Three Passes trek with a climb like Island Peak or Lobuche Peak. Since they are right there in the heart of the Khumbu, it’s pretty straightforward to slot a summit attempt into your schedule. Just keep in mind that you will need to add a few extra days to help your body adjust to the altitude. Plus, you will need some specific climbing gear and the right permits to make it happen. If you share your plans with us, we can customize them according to your needs.
If you want to tackle the Three High Passes on your own terms, Radiant Treks is there for you. We specialize in private treks, meaning you set the pace and control the daily schedule. If you are after a more tailored experience, let us know—we will organize a private departure just for your group. This gives you complete flexibility in the journey. Meanwhile, our team can also focus entirely on your goals and preferences.
That is also possible. It’s a fantastic way to skip the multi-day slog back to Lukla, saving you plenty of time and giving your knees a well-deserved break. We can easily arrange a flight directly from either location, which also happens to give you an incredible bird's-eye view of the peaks on your way out.
Yes. At Radiant Treks, we have several other routes to fit your schedule and goals beyond this 16-day trek. You can also choose the trek of our Two Passes route or the EBC-Cho La-Gokyo circuit. For shorter trips, we also lead a 12-day trek to Gokyo and Renjo La, along with Everest Panorama or Tengboche trek options.
Booking & Cancellation
There’s no strict deadline for booking this trek. But it is honestly best to book your Everest Three High Passes trek as far in advance as you can. That is because this route takes a bit more coordination. As such, getting an early start ensures everything goes smoothly.
We ask for a 20 percent deposit to confirm the booking—this amount allows us to begin securing your permits, flights, and all those essential lodge bookings before they fill up. You can pay the remaining balance in full at the time of booking. Or you may also settle by cash or card upon arrival in Kathmandu before the trip begins.
If you cancel at least seven days before we head out, we charge a 30 percent fee of the total cost. Please keep in mind that the 20 percent deposit is non-refundable. If Radiant Treks has to cancel your trip due to an emergency and we can’t provide you an alternative, we’ll refund your payment, minus any card processing fees.
Definitely. Radiant Treks allows you to postpone a trek after you book it. However, since we generally make all necessary arrangements with the booking fee we have received, you will be required to cover that cost. Likewise, you are liable to cover the price difference if the updated trip cost has changed.
You can, and we always do our best to fit in last-minute bookings. However, we can't always guarantee such bookings on the exact dates. That is so because of the fact that getting your permits, flights, and teahouses sorted takes time and coordination. Therefore, it is always better to reach out early. If you are hoping for a good spot, please email us at info@radianttreks.com as soon as you can.
The Ultimate Everest Three Passes Packing List
Trekking the Everest Three High Passes is one of the most rewarding challenges, but your experience will largely depend on your gear. The weather in the Khumbu can turn from sunny and mild to freezing and wind-battered in a matter of minutes. The secret isn’t to pack for every scenario with a massive wardrobe. However, you should pack for the layering system that handles anything the mountain throws at you. If you are unsure where to start, you can also check our Everest packing guide for a more detailed breakdown, including essentials listed in the equipment checklist for trekking above 3,000 meters.
Here is the field-tested list to help you stay warm, dry, and comfortable on your journey.
Clothing
Layering is your most reliable strategy for staying comfortable in the unpredictable Himalayan climate. You will want gear that breathes while you are pushing up a steep trail, keeps you cozy when you pause to rest, and acts as a shield when the mountain weather suddenly shifts.
Base Layers (2-3 sets)
Think of these as your second skin. They sit right against your body to pull sweat away and trap your natural warmth.
- Thermal Materials: Merino wool or technical synthetics are the best options. They keep your body temperature steady despite a change in the intensity of your hike.
- Avoid Cotton: Never wear cotton. It soaks up sweat and stays wet, which will make you feel cold and miserable the moment you stop moving.
- Flexible pieces: Look for thin, flexible pieces that feel light while you are working hard, but keep you dry and comfortable all the way from the start of the trail to your sleeping bag at night.
Mid-Layers (2-3 sets)
These pieces are your main source of warmth. You will wear them to get through those freezing early morning starts. They are what you will be living in once you are hanging out in a cold teahouse at the end of the day.
- Fleece or Wool: A fleece jacket or a wool sweater is particularly effective at holding in your body heat while still letting your skin breathe so you don’t get clammy.
- Lightweight Jackets: Bring a packable, insulated ‘puffy’ jacket for a water break or when you are standing still at a high, windy pass.
- Adjustable Fit: Go for pieces with full-length zippers. They make it easy to vent out some heat or take a layer off once you start breaking a sweat on a steep climb.
Outer Layer (1 set)
This is your main shield against bad weather. Keep this handy for rain, snow, or those days when the wind gets strong enough to make you feel cold.
- Hard-Shell Jacket & Waterproof Pants: Bring a jacket and a pair of trousers that are durable enough to keep you completely dry if you are caught in a storm or walking through snow.
- Windbreaker or Technical Shell: You need an outer layer that completely stops the breeze from cutting through your clothes, as that is the fastest way to lose body heat.
- Adjustable Hood: Look for a jacket with a stiff, adjustable hood—when the wind starts whipping around, you should be able to pull that up and cover your neck and face.
Down Jackets (Heavy & Light)
These are your best options for staying warm when the temperature really drops.
- Heavy Down Jacket (1): A must-have for freezing mornings, cold nights, and the push to high-altitude spots like Kala Patthar. Note: Radiant Treks provides these for you.
- Light Down Jacket (1): Great for the lower, milder parts of the trek. It’s light enough to stuff in your daypack when you don’t need it.
Trekking Shirts & Pants (3-4 shirts, 3 pants)
These will probably get more use than anything else in your backpack. Go with clothes that are comfortable to hike in and dry reasonably quickly after washing.
- Shirts: Bring a mix of short- and long-sleeve shirts. Go for shirts that breathe well and dry fast, so you aren’t stuck hiking in sweaty clothes.
- Pants: Grab a couple of pairs that are lightweight and easy to move in. Many hikers prefer zip-off styles—they’re incredibly handy when the temperature shifts or the sun starts beating down.
Head & Hands
Your hands and head are the first to feel the chill of the Everest region. So, staying prepared with the right coverings makes all the difference.
- Warm Hat/Beanie: Pack a fleece or wool cap that pulls down over your ears—it keeps you warm and comfortable.
- Sun Hat/Cap: The sun is brutal at high altitudes, so make sure you have a brimmed hat to keep your face shaded.
- Gloves (2 pairs): Bring a pair of thin thermal liners for base warmth. Also, a pair of thick, waterproof outer layers is essential for when things get rough.
- Buff/Neck Gaiter (2 pieces): A total lifesaver for keeping dust and biting wind out of your lungs and off your neck.
Footwear
Your feet are the only things that will get you over those challenging high passes. So, don’t skimp on them. Instead, get quality footwear so that they will carry you all the way to the finish line of the Everest Three High Passes Trek comfortably.
- Trekking Boots (1 pair): You need sturdy, waterproof boots with solid ankle support and serious grip. The golden rule: Break them in thoroughly before you even board the plane. Never, ever start the Three Passes trek with a fresh-out-of-the-box pair.
- Camp Shoes/Sandals (1 pair): Your feet will be screaming for freedom after eight hours of hiking. Having a pair of light sneakers or Crocs/sandals to wear around the teahouse is very helpful.
- Trekking Socks (5-6 pairs): Pack high-quality, moisture-wicking hiking socks. It is a smart move to pack plenty of socks so you can start each day with a fresh, dry pair. Keeping your feet dry is the easiest way to prevent blisters while you are out hiking.
- Warm Socks (2-3 pairs): These are your “night socks.” Keep them bone-dry and reserved strictly for sleeping; your toes will thank you when the temperature drops well below freezing in the lodges.
- Microspikes/Crampons (1 pair): Essential for the passes. You’ll likely encounter icy, frozen sections on Cho La or Kongma La where normal boots just won’t work. These simple slip-on spikes are non-negotiable for safety.
Trek Gear & Sleeping
You are looking at a two-part carry system here: a duffel for the porter to haul, and a daypack for you to keep your essentials close at hand.
- Duffel Bag (1): This is the heavy-duty, waterproof bag (80-100L) for all your gear that goes on the porter’s back. Provided by Radiant Treks.
- Daypack (1): You will want a 30-40L pack with a proper hip belt. This carries your daily must-haves: camera, water, layers, and those important documents. Make sure it fits comfortably before you leave.
- Rain Covers: Don’t skip these. Get dedicated waterproof covers for both your daypack and the duffel. Even if it’s not pouring, mountain weather is unpredictable.
- Dry Bags & Ziplocks: These are non-negotiable. Use them to keep your electronics, passport, and extra cash dry—there’s nothing worse than arriving at a high pass with soaked gear.
- Sleeping Bag (1): It gets bitterly cold at night in the high lodges, and they aren’t heated. You need a bag rated for at least -10°C to -15°C to actually get some sleep. Check if you need to rent a sleeping bag from us or bring your own.
- Sleeping Bag Liner (1): Whether it’s fleece or silk, this is a total win. It adds a crucial bit of extra warmth, and honestly, it’s just nice to keep your sleeping bag a little cleaner throughout the trek.
Personal Care & Safety
Up on the Three Passes, you aren’t going to have much luxury, so keep your kit minimal and eco-friendly.
- Toiletries: Pack the essentials—toothbrush, toothpaste, a small bar of soap, and a quick-dry towel. Wet wipes will be your best ally for “trail showers” when a real one isn’t an option.
- Skin Protection: The sun at high altitude is brutal and will burn you fast, even when it’s freezing. High-SPF sunscreen and a heavy-duty, medicated lip balm are mandatory, not optional.
- First Aid: Your guide carries a group kit, but you need your own backup for the basics. Bring blister tape (Leukotape or Compeed is very helpful for your feet), ibuprofen, paracetamol, and rehydration salts.
- Hygiene: Keep two bottles of hand sanitizer in your bag and make it a habit to use them before every single meal.
Electronics & Essentials
These small, practical items often make the difference between a rough trip and an incredible one.
- Trekking Poles (1 pair): They are essential for saving your knees on the long, grueling descents after crossing the high passes.
- Headlamp (1): You’ll be starting early for those pass summits and moving through dark, unlit teahouses at night. Pack one with extra batteries; you really don’t want to be caught in the dark.
- Power Bank (1): Bring a high-capacity one (20,000mAh or more). Charging at the high-altitude lodges is slow, unreliable, and surprisingly pricey.
- Water Storage: Aim for a total capacity of 2-3L. Most people like a hydration bladder for easy sips while moving, backed up by a durable water bottle.
- Water Purification: Bring purification tablets or a portable filter—it’s much cheaper, better for the environment, and keeps you from dealing with plastic trash in the mountains.
- Sun Protection: Polarized sunglasses are non-negotiable. The glare off the snow during the high-pass days is intense, and you need good protection to avoid snow blindness.
- Documents & Cash: Keep your passport, permits, and a solid stash of NPR (at least 20,000–30,000) for those “extra” costs like showers, charging, or snacks. Keep it all in a dedicated waterproof pouch so it stays dry, no matter what.
Real Stories from our TripAdvisor Page
Curious about what travelers say about Radiant Treks? Discover genuine experiences on our Reviews Page.
Everest Three High Passes Trek Route Map


