

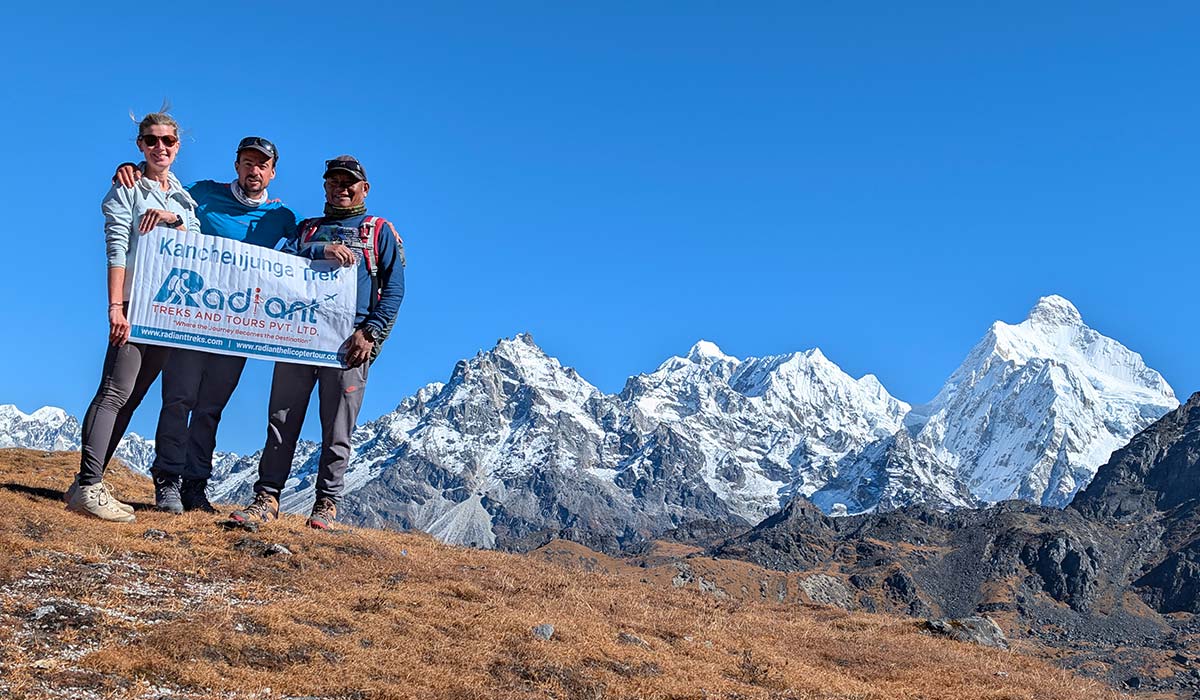


23 Days Kanchenjunga Circuit Trek Cost – Full Board Package
| Group Size | Cost in USD |
| 2 Person (If you are single, contact us) | $2200 per person |
| 3-4 Person | $2100 per person |
| 5+ People | $2000 per person |
The Kanchenjunga Circuit Trek is a long and remote trek in eastern Nepal that takes you up to the north and south base camps of Mount Kanchenjunga (8,586m), the third-highest mountain in the world.
The trail starts in lower hills and farmland, then moves through forest and into high alpine terrain, glacier valleys, and mountain passes. As you go higher, villages become fewer, and the trail feels much quieter than Everest or Annapurna.
It usually takes around three weeks and passes through the Kanchenjunga Conservation Area and local villages. A guide and special permits are required, and the altitude makes acclimatization important. Radiant Treks offers this trek with guided support and logistics.
It’s a demanding trek, but if you want fewer crowds and a more remote trail, this route stands out.
Why Choose the Kanchenjunga Circuit Trek?
Less crowded, more remote
This is one of the quietest trekking routes in Nepal. You won’t run into the same volume of trekkers as you would in the Everest region treks or the Annapurna Circuit Trek.
Covers both base camps
The route includes both the north (Pangpema) and south (Oktang) base camps of Kanchenjunga, which not all treks do.
Longer, more complete journey
With a 23-day route, you move through multiple landscapes and climate zones rather than staying in one region.
Restricted area, guided trekking
The region requires permits and a licensed guide, which keeps the trail less commercial and more controlled.
Basic but real trail experience
Accommodation is simple, especially at higher altitudes. It’s not a comfort trek, but it feels closer to how trekking used to be.
Gradual acclimatization built in
The itinerary allows time to adjust to altitude, which is important given how remote the route is.
Handled logistics with Radiant Treks
Permits, transport, guides, and the overall route are sorted in advance, so you are not figuring things out along the way in a remote region.
Note:
This trek is better for those who are fine with longer days, basic stays, and patchy networks. If you want something that is a bit shorter, then the 16 Days Kanchenjunga North Base Camp Trek (North) is also an option.
23 Days Kanchenjunga Circuit Trek Cost (Full Board Package)
The cost for the 23-day Kanchenjunga Circuit Trek usually falls between USD 2,000 and USD 2,200 per person, depending on group size. Smaller groups tend to pay a bit more.
Most of the main logistics are already taken care of — getting in and out of the trail, a few nights in Kathmandu, and the basic setup once you are on the trek. You will stay in teahouses, and the package generally covers meals along the route.
The package also includes permits, along with a guide and porter. Things like personal spending, travel insurance, tips, or any extras on the trail are separate.
How Difficult Is the Kanchenjunga Circuit Trek?
This trek sits somewhere between moderate and challenging, but for most people, it will feel closer to challenging. That is not because it is technical, but because it’s long and quite remote.
Some facts:
- Duration: Around 3 weeks on the trail
- Walking Days: Often 6 to 8 hours daily
- Altitude: Goes past 5,000 meters
- Trail Conditions: Basic, especially higher up
- Remoteness: Not many easy exit points
If you have done a few multi-day treks before, it’s manageable. But it takes more patience than anything — you are walking day after day, and that adds up.
How Our Itinerary Supports The Kanchenjunga Circuit Trek
A trek like Kanchenjunga depends on how it’s planned. If the pace is off, it can become difficult very quickly. The way Radiant Treks sets it up is more about keeping things steady than about covering distance quickly.
- Time to adjust to altitude
Extra nights are placed at key stops like Ghunsa, so your body has time to adapt before moving higher.
- Pacing that doesn’t push too hard
Some days are intentionally shorter, which helps you recover and stay consistent over nearly three weeks on the trail.
- Altitude gain is kept gradual
You are not jumping too high or too fast, which makes a difference over a long route like this.
- Guides handle the flow
You don’t have to think too much about the route or timing — they adjust things as needed along the way.
Getting Ready For The Kanchenjunga Trek
Before the trek starts, there’s a day in Kathmandu to sort out practical things. You meet your guide, go over the itinerary, and check your gear properly. This is the time to make sure your boots, layers, and cold-weather equipment are suitable, and you can pick up or rent anything missing.
You also get a clearer idea of how the trek will run — daily distances, altitude gain, and where acclimatization stops happen.
Radiant Treks arranges permits, transport, and guide support in advance. As a result, the paperwork and logistics are already handled before you leave Kathmandu.
Food And Sleeping On The Kanchenjunga Circuit
Kathmandu (Before and After the Trek): You stay in a standard hotel with the facilities of a private room, hot water, and breakfast. It’s mainly a place to rest, sort your gear, and recover after the trek.
On the Trail: Once you leave the city and reach the trailhead, things get simpler.
- Teahouses: In lower areas, lodges are basic but comfortable. As you go higher (Ghunsa onwards), rooms become simpler — wooden beds, thin walls, and shared toilets.
- Higher sections: Places like Lhonak or near base camp have very limited facilities. Expect to stay in cold rooms because there is no heating in the bedrooms. And the food options are also fewer.
Food on the trek: Dal bhat is the most reliable meal. You’ll also find noodles, potatoes, eggs, and simple soups. Meat is available in some places, but it’s safer to stick to vegetarian food.
Kanchenjunga Circuit Trek Transportation Guide
- The Standard Way: Getting to the Kanchenjunga trailhead takes a bit more time than most treks in Nepal. The journey usually starts with a flight from Kathmandu to Bhadrapur. It is then followed by a long drive towards Taplejung and then further up to Sekhathum. Depending on conditions, this can take a full day or more.
- The Reality: Road conditions vary along the way. The lower sections are easier, but it gets rougher and slower as you move closer to the trailhead. You can expect delays, and the last stretch can feel long.
- Road Travel: The road sections are done by a private jeep, which is more practical for this route. It allows you to move at a steady pace. Furthermore, you need not wait for other passengers, especially on the rougher parts of the journey.
Guides, Porters, and Group Size
- Guides (Mandatory): The Kanchenjunga region is a restricted area. This is one of the reasons you can’t trek here on your own. A licensed guide is required to obtain permits. The guide plans the route, manages your walking pace, and addresses any issues that you face along the way.
- Porters (Recommended): Hiring a porter is not mandatory on this trekking trail. And you can carry your own gear. But most trekkers choose to hire a porter because it makes the long days easier. That is true, especially at higher altitudes where energy matters more.
- Solo Travelers: You can join the trek as a solo traveler, but you won’t be trekking alone. A guide is required, and permits are usually arranged through an agency.
- Group Option: If you don’t want to go privately, you can join a small group. It’s a practical way to share costs and trek with others on the same route.
Note: You can do this trek solo or with a group. Let us know your dates, and we will arrange the rest of the plan around them.

Why Trek The Kanchenhunga Circuit With Radiant Treks?
- Your trek is led by guides who have actually walked this specific route. They are not generalists rotated in from Everest or Annapurna, but people who know Kanchenjunga's passes, weather, and villages firsthand.
- Your permits are arranged before you even land in Kathmandu, so your first day in the country isn't spent waiting in a government office.
- Your itinerary is built around real acclimatization at Ghunsa, because on a trek that crosses two base camps above 4,700 meters, altitude is the thing that actually ends trips early, not distance.
- Your on-ground support is based right here in Kathmandu, which means weather shifts, closed passes, or road issues reach your guide within hours, not days.
- Your trek happens on your schedule. Even if you are going solo, a licensed guide comes with you either way, and the dates are built around you, not a fixed departure calendar.
- Your route is walked by Sherpa guides who grew up in this region, the kind of people who notice altitude symptoms, trail changes, or a shift in weather before it becomes a real problem.
- Your trek supports the villages along the route directly, since the teahouses and lodges we work with are chosen with community-based, sustainable tourism in mind, not convenience.
- Your costs are laid out upfront — meals, permits, guide, and porter included from day one, with nothing sprung on you once you are already on the trail.
- Your journey covers both Kanchenjunga base camps, north and south, a combination that not every operator's Kanchenjunga itinerary includes.
23-Day Kanchenjunga Circuit Trek Itinerary
You arrive at Tribhuvan International Airport, where a Radiant Treks representative receives you. Then you will be transferred to your designated hotel. After check-in, you can just rest for a bit and get settled.
At some point later, there’s a short briefing about the trek — mainly going over the plan and what the next few days will look like.
After that, if you feel like heading out, you can walk around Thamel or visit a nearby temple, but otherwise it’s a quiet first day.
The second day is just about getting things in order in Kathmandu before heading to the trailhead. For that, you meet your guide, go over the plan, and check your gear to make sure everything is in place.
It also gives you time to adjust a bit — especially if you have just arrived — and sort out anything you are missing before leaving the city.
If you have some spare time, you can walk around Thamel or opt for the half-day sightseeing tour to visit nearby places like Swayambhunath or Pashupatinath. However, the day is mostly kept flexible so that it is easier for you to decide what to do.
Today, your trek gets a formal start — catch a morning flight to Bhadrapur for that. After landing, you head straight for Phidim without much of a stop.
You spend most of the day traveling. The first part runs through the plains, and then the road slowly climbs into the hills. It’s not a quick drive, and some sections are rough, so it can take time.
By the time you reach Phidim, it’s usually late in the day. You check in, eat, and rest for the night.
Overnight at Phidim
Phidim is a small hill town in the Panchthar district, set above the Hewa Khola. It’s not a major destination on this route. However, it has a relaxed feel and a mix of local communities, mainly Limbu and Rai.
You will find small shops along with local eateries and basic lodges here. On a clear day, there are distant views from higher points around the town, but most people pass through without exploring much. It works well as a first stop before heading deeper into the region.
Elevation Gain: 350 m / 1,148 ft
The road journey continues today as well. As such, from Phidim, you drive a jeep to Sekhathum. It’s another long day, passing through places like Ilam and Taplejung before heading further into the hills.
The road conditions vary. Some sections are fine, but it gets rougher and slower as you go deeper. The route follows river valleys, with views of farmland, forest, and small villages along the way.
By late afternoon or evening, you reach Sekhathum. It’s a small settlement where the road ends and the trekking trail begins the next day.
Overnight at Sekhathum
Sekhathum sits at the junction of the Tamor River and Ghunsa Khola, surrounded by steep hills and dense greenery. This place is more remote compared to Phidim. In addition, you also start to notice the shift from road travel to trekking terrain.
There are a few simple teahouses here, mainly used by trekkers and locals passing through. It’s a quiet stop, with the sound of the river nearby, before the trek begins.
Elevation Gain: 920 m / 3,018 ft
You will actually start the trek on the fifth day of your arrival in Nepal. The trek begins at Sekhathum. The trail follows the Ghunsa Khola, with a few suspension bridges along the way. In some parts, the path runs just above the river and can feel a bit narrow.
You pass through small places like Jongim and Ghaiyabari. The route goes through forest most of the time — bamboo in the lower sections, then oak and patches of rhododendron as you go higher. It’s a steady climb, nothing technical, but you do feel the gain. By afternoon, you reach Amjilosa and stop for the night.
Overnight at Amjilosa
Amjilosa is a small stop on the Kanchenjunga trail, between Sekhathum and Gyabla. It lies within the Kanchenjunga Conservation Area and is mostly used as a stop for trekkers heading further up the trail.
There are a few basic teahouses here. It’s quiet, surrounded by forest, and feels more remote compared to the lower villages. You’ll notice fewer settlements from this point onward.
Elevation Gain: 210 m / 689 ft
The path today stays in the forest for most of the day as you leave Amjilosa and head toward Gyabla. You hike through a mix of bamboo forests at first, then oak and rhododendron as you go higher.
You pass Ghaiyabari and later Phale. Nothing big happens on this stretch; it’s just a steady walk with a few ups and downs. Compared to yesterday, it feels a bit easier.
You reach Gyabla by afternoon and stop there.
Overnight at Gyabla
Gyabla is a small village on the Kanchenjunga Circuit Trek route. A few houses, a couple of teahouses — that’s about it.
There are some small fields around, and you will see people going about their day. It’s quiet. There is nothing to do here, and you have time to rest, relax, and rejuvenate.
Elevation Gain: 865 m / 2,838 ft
Today, the journey is to reach Ghunsa. The trail still runs through the forest for a while, though it starts to open up in places as you gain height.
Not long into the walk, you pass Phale, a small village with a more Tibetan feel — prayer flags, stone houses, and a few quiet teahouses. After that, the trail follows the Ghunsa Khola most of the way.
It’s a steady walk today. No big climbs, but you do feel the altitude a bit more than before. You reach Ghunsa by afternoon.
Overnight at Ghunsa
Ghunsa is a larger settlement in the upper valley of the Kanchenjunga region. And it is also an important stop on the route to Kanchenjunga Base Camp. The village is closely linked with Tibetan Buddhist culture, which you can see in the monasteries, prayer flags, stone houses, and the everyday rhythm of the place.
It is also one of the main acclimatization stops on the trek. Because of its location and better teahouse setup, many trekkers spend extra time here before moving towards higher places like Kambachen and Lhonak. On clear days, the wider valley and the surrounding peaks begin to feel much closer from here.
After a few days of gaining altitude, you stay in Ghunsa today rather than heading to the next stop. Instead, you will stay in Ghunsa for acclimatization. Instead of moving higher, the idea is to give your body time to adjust before heading further up.
You don’t just sit around all day. A short hike above the village helps with acclimatization. One common option is to walk up towards the ridge in the direction of Jannu Base Camp (Kumbhakarna) at an elevation of 4,400 meters, then return to Ghunsa. It is a trek of about two to three hours, covering a distance of around three to five kilometers (two-three miles).
The rest of the day is easy. You can walk around the village and visit the monastery there. Or you can simply choose to rest for the day.
Elevation Gain: 455 m / 1,493 ft
Ghunsa sits behind you on the ninth day. As you have your breakfast and step out, you realize the trail is starting to climb up the valley towards Kambachen. The trail stays close to the Ghunsa Khola. This section of the trail stays close to the Ghunsa Khola.
You cross places like Rongpung, where you might see yak grazing areas and a few seasonal shelters. After this point, the forest starts to thin out, and the trail feels more open.
The walk is steady. Not too steep, but you do notice the altitude a bit more now. Jannu (Kumbhakarna mountain) starts to show up properly as you move further in.
You reach Kambachen by afternoon and stop there.
Overnight at Kambachen
Kambachen is a small stop on the Kanchenjunga Circuit Trek, set in an open valley below Jannu. It feels more exposed here compared to the lower villages.
There are only a few teahouses. Most people just rest, eat, and keep things slow because of the altitude.
Some short walks above the village help with acclimatization. If the weather is clear, you get closer views of the surrounding ridges and Kumbhakarna.
Elevation Gain: 730 m / 2,395 ft
You leave Kambachen and continue up the valley. The trail passes Ramang, then continues over rough ground with patches of moraine and loose rock.
There’s not much vegetation left now. The valley feels wide and empty, and the wind picks up in places. You walk alongside the Kanchenjunga Glacier for part of the day.
Jannu (Kumbhakarna) stays in view for a while, though the landscape itself becomes the main thing you notice.
It’s a steady walk, but the altitude slows you down. You reach Lhonak sometime in the afternoon.
Overnight at Lhonak
Lhonak is a small stop near the glacier, with just a few basic teahouses. No real village here.
People usually rest, eat, and keep it slow. The next day goes higher towards Pangpema, so this particular stop matters.
Elevation Gain: 363 m / 1,191 ft (one way)
This is the big day of the Kanchenjunga Circuit Trek, because today you make the push to Pangpema, the North Base Camp of Kanchenjunga. You leave Lhonak early, since it’s a long day out and back. The trail follows the Kanchenjunga Glacier, over loose moraine and rocky ground. There isn’t much to shelter you from the wind up here, so layers matter.
As you get closer, Kanchenjunga’s north face opens up in front of you, along with Wedge Peak or the Chang Himal and the glacier itself. It’s one of Nepal’s most remote base camps, and you will likely have it mostly to yourself. There isn’t a village at Pangpema. Rather, it is something like a goth, a basic herder’s shelter used seasonally, so this is a day hike rather than an overnight stop.
After some time at the base camp, you retrace your steps back down to Lhonak for the night. It’s a demanding day, given the altitude, but most trekkers agree it’s the highlight of the whole route.
Overnight at Lhonak
You are back at the same teahouse from the night before. It’s a good chance to rest properly, since tomorrow starts the long descent back toward Ghunsa.
Elevation Loss: 1,185 m / 3,888 ft
Today’s walk is mostly downhill. It means you will retrace the trail through Kambachen and back into the tree line. It’s a long day, but descending is easier on the body than the climb up was. The valley starts to feel less exposed the lower you go, and the wind that followed you at Lhonak and Pangpema settles down.
You pass through Kambachen again, then drop through the rhododendron and oak forest toward Ghunsa. The trail follows the Ghunsa Khola most of the way, and it’s a good stretch to take in the views you may have missed while climbing.
By the time you reach Ghunsa, you will notice the air feels noticeably thicker and warmer. It’s a welcome change after several days above 4,000 meters.
Overnight at Ghunsa
Same village as before, but it feels different on the way back down — familiar, and a bit more relaxed. It’s a good spot to recover before the trail turns toward the passes.
Elevation Gain: 695 m / 2,280 ft
Leaving Ghunsa, the trail climbs steadily through alpine forest before opening into higher meadows. It’s a shorter day compared to what’s behind you, but the climb is fairly consistent, so you still feel it.
As the trees thin out, Kanchenjunga and Jannu come back into view, this time from a different angle. Sele Le Base Camp sits close to the pass itself, inside the Kanchenjunga Conservation Area. So, keep an eye out for wildlife — red pandas and snow leopards have both been spotted in this stretch, though sightings are rare.
Accommodation here is basic. You will be staying in stone huts rather than proper teahouses. However, it’s enough for the night, and the setting more than makes up for it.
Overnight at Sele Le
Sele Le isn’t a village; rather, it is a handful of stone shelters built for trekkers crossing between the Ghunsa and Simbua valleys. At 4,290 meters, it sits right on the ridge itself, which is why it works more as a staging point than a destination. Facilities are basic: simple stone rooms, thin mattresses, and shared cooking space. But on a clear evening, you get uninterrupted views of Kanchenjunga and Jannu right outside the door. It’s cold and windy after dark, so most trekkers eat early and settle in, since tomorrow means crossing three passes back to back.
Elevation Gain: 480 m / 1,575 ft
Elevation Loss: 900 m / 2,953 ft
This is one of the longer as well as more physically demanding days on the Kanchenjunga Circuit Trek, crossing three passes back to back before dropping into Tseram.
Sele La: You start the day already at the pass, since last night’s stop sits right near it. It marks the divide between the Ghunsa and Simbua valleys. And the early morning light here often gives the clearest views of Kanchenjunga before clouds build later on.
Sinion La: The highest of the three, reached after a steady climb along a narrow ridge. Wind is usually strongest here, with little shelter. On a clear day, Makalu and Everest become visible in the distance, alongside closer views of Jannu and Kanchenjunga.
Mirgin La: The last of the three, reached after a short descent and ascent from Sinion La. It offers one of the widest panoramas on the whole trek — Kanchenjunga, Jannu, Makalu, Lhotse, and Everest together on a clear morning.
From Mirgin La, the trail drops through rugged terrain, with loose scree underfoot in places. It’s not technical, but the descent demands steady footing after a long morning at altitude. By the time you reach Tseram, a small settlement in a high meadow, you will have covered serious ground across three passes in a single day.
Overnight at Tseram
Tseram sits in a high alpine meadow, one of the last proper stops before Oktang Base Camp. It’s used mainly by trekkers on this exact route, so the teahouses here are simple but functional. You’ll usually find dal bhat, a warm stove, and a chance to dry out gear after a long day of crossing passes. Rai and Limbu families run most of the lodges. It’s quiet, cold at night, and a good place to rest before tomorrow’s round trip to the south base camp.
Elevation Gain: 860 m / 2,822 ft (one-way)
Today’s the second base camp of the trek, and honestly, it’s the one a lot of people have been waiting for — Oktang, on the south side of Kanchenjunga. You set out from Tseram early, following the Yalung Glacier valley as the trail climbs.
There’s no real path to speak of in places, just rock, moraine, and glacier ice stretching out ahead of you. But the south face of Kanchenjunga is right there the whole way up, getting bigger as you go. It’s hard to look anywhere else, really.
Once you’re at Oktang, take your time. There’s no food or water available up here, so whatever you are carrying is what you have got. But most people find they don’t want to rush off anyway upon reaching here. The amphitheater of peaks around you, including Kanchenjunga, Rathong, and Kabru, is about as dramatic as it gets on this whole trek.
There’s nowhere to stay at Oktang itself. So, once you have had your fill of the view, you head back the way you came, down to Tseram for the night.
Overnight at Tseram
Back at the same lodge as the night before. With both base camps behind you now, the trek shifts into descent mode. Everything from here on is heading down, through forest and villages, toward the road at Bhadrapur.
Elevation Loss: 875 m / 2,871 ft
The trail drops steadily from Tseram and moves out of the high alpine zone. It means you descend back into the forest on this day. Rhododendron and oak start to reappear, along with birdlife that’s been mostly absent above the tree line.
You will pass a few scattered settlements along the way, most of them used seasonally by herders. The descent is fairly gentle overall, which makes for an easier day than the passes you just crossed.
Torangden itself is a quiet stop, tucked into the hillside with views back toward the glacier valleys you’ve just left behind.
Overnight at Torangden
Torangden is a small settlement tucked into the hillside, back within the tree line after several days above it. A handful of teahouses serve trekkers descending from Tseram. It’s a quieter and more relaxed stop compared to the high passes. Food is basic, usually dal bhat, noodles, or soup.
Elevation Loss: 915 m / 3,002 ft
The forest keeps thickening as you drop down from Torangden. Somewhere along the way, you notice the whole feel of the place has changed. It’s not Alpine anymore. It is subtropical, thick and green, with terraced fields starting to show up on the hillsides. You are getting close to lower, more lived-in country now.
By the time you reach Yamphudin, sitting where two rivers meet, it’s obvious you have crossed some kind of line. This is village life again, proper village life, with Limbu, Rai, and Sherpa communities going about their day. After so long in the remoteness up high, it’s a good place to just slow down and let it sink in a bit.
Overnight at Yamphudin
The teahouses here feel more settled than anything you have stayed in over the past few days. They are a bit more permanent and a bit more lived-in. You will probably notice more everyday activity too: people tending livestock, working the fields, and just getting on with things. It’s a comfortable, grounded sort of stop, and honestly, after the passes and base camps, it’s a welcome change of pace before the last stretch begins.
Elevation Loss: 170 m / 558 ft
Today’s walk is gentler than the past few days, moving through dense forest with a decent chance of spotting langur monkeys and various birds along the way. The trail passes small farms and settlements, a clear contrast to the high, empty terrain above Tseram.
Khebang itself is a farming village, and agriculture is still the main way of life here. It’s a relaxed stop and a good marker of how far you’ve come from the glaciers and passes.
Overnight at Khebang
Khebang is a farming village, home mostly to Limbu and Rai families who rely on agriculture for their livelihood. The lodges here are simple and home-run, with home-cooked meals rather than a standard teahouse menu. It’s a peaceful stop, with terraced fields around the village and a slower rhythm than anywhere on the high trail. After days of forest, moraine, and passes, Khebang feels like a return to ordinary rural life in eastern Nepal — a good marker of how far the trek has come.
Elevation Loss: 490 m / 1,608 ft
The trail keeps dropping today, and you will notice the air getting warmer with every hour. Rice paddies and vegetable farms become a regular sight, and the scenery feels a world away from the glacier valleys back at Pangpema and Oktang.
Khandembe sits in the Kabeli River valley, looking back at the eastern Himalayan peaks you’ve just come through. It’s a quiet, restful spot before the final stretch out.
Overnight at Khandembe
Khandembe is a small farming village in the Kabeli River valley. The locals grow rice, maize, and millet on the surrounding land areas. Basic teahouses here have simple rooms and simple meals. It’s a peaceful place. The Himalayas are still visible in the distance, and all around you is a warmer, greener country. It’s not a major stop on the route, but it’s a comfortable, low-key spot to rest before the final leg of the trek toward Tharpu and the road ahead.
Elevation Gain: 180 m / 591 ft
This is a shorter, easier day, following a trail through terraced fields and small villages rather than any real climbing. It feels more like a countryside walk than a mountain trek at this point.
Tharpu is a small village and a common starting point for those attempting nearby Tharpu Chuli, though that’s outside the scope of this trek. For you, it’s simply a comfortable last night on the trail before the drive out begins.
Overnight at Tharpu
Tharpu is a small village and the last overnight stop on the trekking portion of the route. Facilities are simple but comfortable, and it’s a good place to reflect on the past three weeks before the long drive out begins tomorrow. The pace here is relaxed, with terraced fields and village life replacing the high alpine terrain of the earlier days.
Elevation Gain: 1,509 m / 4,951 ft
Today the trekking part of the trip ends, and you change to a long bus or jeep ride back to Bhadrapur. The road drops steadily out of the hills, passing green valleys and terraced farmland as the altitude falls away.
It’s a full day of travel, so it’s worth treating it as downtime — a chance to rest and process the past three weeks. Bhadrapur itself is a transit town near the Indian border, mainly useful for its airport connection back to Kathmandu.
Overnight at Bhadrapur
A functional stop before the flight out. Standard hotel facilities, mainly used by travelers passing through.
Elevation Gain: 1,309 m / 4,295 ft
A short flight takes you back to Kathmandu, with views of the eastern Himalaya from the air. It is a chance to get a different perspective on the same peaks you were walking beneath a few weeks ago. Once you land, you are free for the rest of the day.
If you are up for it, Thamel is a good place to unwind, get a proper shower, and have a meal that isn’t dal bhat. This marks the official end of the Kanchenjunga Circuit Trek.
Now that you have completed the trek and have no other plans in Nepal, it is time to return home. A representative from Radiant Treks will drop you off at the airport, according to your flight schedule.
Cost Includes / Excludes
Cost Includes
- Private airport pickup and drop-off in a standard vehicle.
- 3 nights' accommodation in Kathmandu at a standard 3-star hotel on a twin-sharing basis, including breakfast.
- Domestic flights and/or vehicle transfers as required for the trek (Kathmandu to Bhadrapur and Bhadrapur to Kathmandu).
- Bhadrapur - Taplejung, Taplejung - Sekhathum private jeep
- Accommodation during the trek in local teahouses or lodges.
- Full board meals (breakfast, lunch, and dinner) during the trek
- An experienced and licensed English-speaking trekking guide.
- A strong porter (shared between two trekkers) to carry your luggage.
- Salary, insurance, and equipment for guides and porters.
- Trekking permits: Kanchenjunga Conservation Area Permit (KCAP) and Restricted Area Permit.
- Comprehensive first aid kit carried by the guide.
- Trekking route map and certificate upon trek completion.
- Applicable government taxes and service charges.
Cost Excludes
- International airfare and Nepal entry visa fees.
- Travel insurance (must include emergency rescue coverage).
- Personal trekking gear and equipment.
- Personal expenses such as snacks, tea, coffee, beverages, and alcoholic drinks during the trek.
- Hot showers, charging facilities, and internet services at teahouses (if applicable).
- Tips for guides, porters, and drivers.
- Any additional costs arising from delays or unforeseen circumstances such as weather or political issues.
- Optional side trips, cultural tours, or activities not mentioned in the itinerary.
Essential Info: Kanchenjunga Circuit Trek e Info
Trek Basics & Essential Info
This is a remote, high-altitude trek in eastern Nepal, reaching both the north and south base camps of Mount Kanchenjunga. At 8,586 meters, it's the third-highest mountain on Earth, and honestly, few treks in Nepal feel this untouched. The route winds through the Kanchenjunga Conservation Area, moving from thick forest into glacier valleys, passing through traditional Limbu, Rai, and Sherpa villages along the way. Compared to busier routes like Everest Base Camp, you will see far fewer trekkers here, which is the main reason many people choose this trek.
Radiant Treks runs this as a 23-day itinerary, arrival and departure in Kathmandu included. Around 18 of those days are spent actually walking. You might see other operators list anywhere from 20 to 26 days for the same route, and that's mostly down to how many rest days are built in or whether Kathmandu sightseeing gets tacked onto either end.
You are looking at roughly 200 to 220 kilometers total, from Sekhathum through to Tharpu, once you factor in the round trips to both base camps. That said, distance alone doesn't tell you much here. Some days cover just 8 kilometers because of altitude, while others stretch past 20 kilometers on the way back down.
That would be Pangpema, the North Base Camp, sitting at 5,143 meters. Oktang, the South Base Camp, comes in a bit lower at 4,730 meters. Neither one is an overnight stop, by the way — both are reached as day hikes, which actually works in your favor when it comes to handling the altitude.
It's a bit of both, really. You head up one valley toward Ghunsa, branch off to both base camps, then cross several high passes over into the Simbua valley before coming down a completely different way. So it's not a clean circular loop, but you're also not walking the same trail twice the whole way.
Mostly, it's how remote it feels. Mobile signal disappears for days at a time, there's no road once you're past Sekhathum, and you will rarely cross paths with other trekking groups. A licensed guide and restricted-area permits are required too, which keeps the numbers low and the trail feeling far less commercial than something like Everest Base Camp or Langtang.
Passes & Base Camps
No, neither one has any overnight facilities at all. Oktang has no teahouse, lodge, or shelter of any kind. Pangpema only has a basic goth, a seasonal herder's shed. Instead, both are visited as day hikes from Tseram and Lhonak. You always return to a proper stop for the night.
Three main passes, all crossed on the same day. Sele La comes first, sitting right where you stay overnight. Sinion La follows next, the highest point of the three. Mirgin La rounds out the trek before the descent to Tseram. It's genuinely one of the toughest single days on the trek.
Yes, on the acclimatization day at Ghunsa. It's an optional hike up toward Kumbhakarna, Jannu's local name. The trail climbs to around 4,400 meters before you return. It's a fantastic way to use your rest day actively. Many trekkers count it as an unofficial third base camp.
They are crossed back-to-back on the same day. Each pass is roughly 4 to 5 kilometers apart. The full crossing takes about 8 to 9 hours total. There's little flat ground between them, just constant up and down. It's less about distance and more about sustained effort.
Sele La sits at 4,290 meters above sea level. Sinion La is the highest, reaching 4,646 meters. Mirgin La comes in slightly lower, at 4,480 meters. All three are crossed within a single demanding day. Altitude alone makes this stretch feel harder than the distance suggests.
Both offer something genuinely different from each other. Pangpema faces Kanchenjunga's north side, right beside the glacier itself. Oktang looks toward the south face, with Yalung Glacier close by. Many trekkers find Oktang's amphitheater of peaks slightly more dramatic. Honestly, doing both is really the best way to decide.
Not technically; no ropes or climbing gear required here. They are demanding mainly because of altitude and long walking hours. Loose scree on some descents does require steady footing, though. Weather can also make the passes tougher on a bad day. A guide's pacing genuinely helps manage the physical difficulty involved.
Yes, all of these points sit well above 4,000 meters. Sinion La and Pangpema both cross above 4,600 meters. Symptoms can appear at any of these high points suddenly. This scenario is exactly why the itinerary includes solid acclimatization time beforehand. Guides also watch closely during pass-crossing and base camp days.
Yes, particularly during winter or after heavy snowfall. Sele La, Sinion La, and Mirgin La are all snow-prone. Closures are far more likely outside spring and autumn. Your guide monitors conditions and adjusts timing if needed. This is one more reason season choice matters so much here.
Booking, Payment & Trip Policies
Honestly, it's not complicated. You just reach out to Radiant Treks through the site, or you can also use email or WhatsApp, and let us know your dates and how many people are coming. Once that's sorted, a 20% deposit secures your spot. That money goes toward getting your permits, transport, and accommodation arranged before you even land in Nepal. You settle the rest once you are actually in Kathmandu, right before the trek starts.
We have two payment methods, and you can choose either for booking. International wire transfers work fine, or you can pay directly with a debit or credit card. One thing worth knowing upfront: card payments add a 4% processing fee on top of whatever you are paying, so if you are covering the full trip cost in one go rather than splitting the deposit and balance, that fee adds up a bit more.
Cancelling isn't complicated, but it does cost you something. Write to Radiant Treks to cancel, and if that happens within seven days of departure, expect a 30% cancellation fee on the total trip cost. And no matter when you cancel or why, that original deposit stays gone — it's simply not refundable under any circumstance.
Yes, that is possible. Rather than losing your deposit to a cancellation, postponing just means covering whatever costs have already gone out plus any price difference if trip rates have shifted since you booked. It's a far better outcome than walking away from your deposit entirely.
This isn't something that happens often, and it's reserved for genuine emergencies, like natural disasters, flight cancellations, strikes, and that sort of thing. If it does happen, you are either offered a comparable alternative trip or a full refund, minus the WeTravel processing fee, assuming there's no suitable alternative available. Things like flights, visas, or insurance you have already paid for elsewhere aren't covered.
Travel insurance is not mandatory, but we recommend you get one. This isn't a trek where you'd want to skip it even if it weren't required. Given how remote this route is and how high it climbs, your policy needs to cover medical emergencies and high-altitude evacuation at minimum, along with trip cancellation. You will need to show proof before the trek starts.
Arrival & Kathmandu Services
A Radiant Treks representative is waiting for you right at Tribhuvan International Airport. They take you straight to your hotel. You won't need to sort transport or logistics on day one. That's all handled before you even land. You can just relax and settle in.
Most travelers can get a visa on arrival at Kathmandu airport. You pay in US dollars, and the cost depends on how many days you are staying. It's still worth checking your country's rules beforehand. A few nationalities need to arrange things in advance instead.
Your package covers hotel accommodation and airport transfers both ways. You will also get a proper trek briefing before heading out. Your guide walks you through the itinerary, permits, and what to expect. If you have got spare time, Thamel is easy to explore on your own. Pashupatinath and Swayambhunath are both worth a visit too.
Domestic flights to Bhadrapur allow baggage weighing around 20-25 kg. You will also get a small carry-on allowance on top of that. This can vary a little depending on the airline. Going over the limit usually means paying an extra fee. It's smarter to pack light for this leg specifically.
Yes, Thamel is full of gear rental shops and outdoor stores. Down jackets, sleeping bags, and trekking poles — all of it's available there. It's a good option if you don't want to buy gear you will barely use again. That said, this trek is long and genuinely remote. Well-fitted, tested gear is worth prioritizing over the cheapest rental you can find.
Permits & Rules
Yes. You need to have two permits. The first is the Kanchenjunga Conservation Area Permit, or KCAP. The second is the Restricted Area Permit, since this whole region is government-controlled. Radiant Treks arranges both in advance. You won't need to visit any office yourself once you are here.
The region sits close to the Nepal-India border, near Sikkim. Because of that sensitivity, the government keeps tight control over who enters. It is also an effort to protect the fragile conservation area and its wildlife. This approach is part of why the trail feels so untouched compared to busier routes.
Yes, a licensed guide is mandatory here, no exceptions. This isn't like the Annapurna Circuit or some other regions where solo trekking is allowed. The Restricted Area Permit simply can't be issued without one. Honestly, given how remote this trail is, you'd want a guide anyway.
No, the previous rule of permits for restricted areas requiring a minimum of two trekkers is no longer in effect. You can trek solo, too, but you need to be accompanied by a licensed guide. If you are trekking solo and want to be a part of a group, then Radiant Treks can still arrange things for you.
Not really. The Restricted Area Permit costs the same whether you are an Indian national or any other foreign trekker. It's the Conservation Area permit and general trekking costs that stay consistent across nationalities too. Some other regions in Nepal do offer SAARC discounts, so it's an easy assumption to make here. But for Kanchenjunga specifically, pricing doesn't work that way. Worth keeping in mind if you're budgeting based on what you have for other treks.
No, independent trekking isn't possible in this region at all. The Restricted Area Permit is only issued through a registered trekking agency. This rule exists specifically to keep a licensed guide involved throughout. It's one of the clearest differences between Kanchenjunga and more open trekking regions.
Radiant Treks usually needs at least a few days' notice. This gives enough time to process both permits properly before departure. Booking a bit earlier is always the safer option here. It also gives extra buffer room in case anything unexpected comes up.
Difficulty, Training & Fitness
This is a challenging trek because of the high altitude and its remote terrain. So, it sits among Nepal's more demanding treks, no question. It's not technical climbing, but it is long. You walk for 18 days straight, often for 6-8 hours each day. With altitude above 5,000 meters, it becomes a significant challenge. Most trekkers describe it as tough but manageable with the right preparation.
Focus on cardio and leg strength for several months beforehand. Hiking with a loaded daypack helps build real trail fitness. Stair climbing, running, and cycling all help build endurance too. Multi-day hikes closer to your departure date are genuinely useful practice. The goal is stamina for consecutive long days, not just one hard day.
Most days involve 6 to 8 hours of walking. Some acclimatization days are shorter, closer to 3-4 hours total. The pass-crossing day, however, is closer to 8-9 hours of walking straight. Terrain and weather can also affect daily walking time significantly. Your guide adjusts pace based on how the group is doing.
Not usually, though it depends on the season. Outside of heavy snowfall, standard trekking boots are generally sufficient. Microspikes are worth packing anyway as a precaution, though. Conditions on Sele La, Sinion La, and Mirgin La can shift fast. Your guide will advise if conditions call for extra traction.
Age really isn't the thing that decides the outcome. What actually matters is fitness and whether you've trekked at altitude before. Plenty of people in their 50s and 60s have completed this route just fine. It really matters that you train properly beforehand and are honest with yourself about your fitness. Worth having a proper conversation with Radiant Treks about any health concerns before booking.
This isn't really a trek built for kids, if we're being honest. The altitude, the remoteness, 18 days of walking back-to-back — that's a lot to ask of a child. Technically, anyone under 15 can join if a guardian is with them the whole time. But realistically, this route suits older, physically prepared trekkers far better than young children.
It's not mandatory, but it genuinely helps a lot. If you have done EBC or Annapurna Base Camp before, that's useful experience. You will already know how your body responds to altitude gain. First-time trekkers can still do this, just with extra preparation. Talk to Radiant Treks honestly about your fitness level beforehand.
Honestly, the Kanchenjunga Circuit Trek isn't the trek to start with. It's long, remote, and reaches well above 5,000 meters. Beginners can still attempt it, but preparation becomes even more important. A few shorter treks beforehand would help a lot. Something like Mardi Himal or Annapurna Base Camp builds useful experience first. If this is genuinely your first trek, talk to Radiant Treks honestly about it.
Best Time & Weather
Autumn and spring both work well here. Autumn runs from late September through November. Spring covers roughly March to May. Autumn usually gives the clearest mountain views overall. Spring brings rhododendrons blooming across the lower forest sections.
Weather shifts a lot depending on when you go and how high you are. Autumn and spring bring the most stable, walkable conditions overall. Winter and monsoon each come with their own real challenges, covered in the table below.
Kanchenjunga Circuit Trek: Weather and Temperature by Season
| Season | Weather & Temperature |
| Autumn (Late Sep-Nov) | Clear skies, stable weather, and best mountain visibility. Daytime temperatures in lower villages are 10-15°C, dropping to -10°C or below near Lhonak and Pangpema at night. |
| Spring (Mar-May) | Warmer days, rhododendrons blooming lower down. Daytime is 12-18°C, and nights are still cold above Ghunsa, around -8°C to -12°C near the base camps. |
| Winter (Dec-Feb) | Snow closes or complicates the high passes often. Daytime temperatures rarely rise above 5°C at higher elevations, while nighttime temperatures regularly fall below -15°C at Lhonak and Pangpema. |
| Monsoon (Jun-Aug) | Heavy rain, muddy trails, and poor visibility most days. Daytime around 15-20°C lower down, humid, with leeches common in the forested sections. |
Technically yes, but it's genuinely tough going. Snow blocks the higher passes fairly often. Sele La, Sinion La, and Mirgin La get difficult. Teahouses above Ghunsa may also close entirely. Most trekkers avoid winter unless they are experienced with snow travel.
Not really recommended, if we're being honest. Rain makes lower trails muddy and slippery. Leeches show up in the forested sections too. Cloud cover blocks most mountain views regardless. Landslides can also disrupt the long road transfers.
Cold and windy, even outside of winter. Mornings are usually the clearest for views. Wind picks up noticeably by early afternoon most days. Temperatures can drop well below freezing overnight nearby. Layering properly here matters more than almost anywhere else.
Genuinely cold, especially above Ghunsa elevation. Nights at Lhonak can drop well below freezing. A proper four-season sleeping bag becomes essential up there. Lower villages like Phidim stay noticeably milder in comparison. Altitude is really the main factor driving the difference.
Yes. Sometimes, weather conditions during the monsoon affect it. Sometimes, poor visibility delays flights. Road conditions can also worsen significantly after heavy rain. It's worth building a buffer day into your schedule. Radiant Treks factors this into itinerary planning where possible.
Accommodation & Food
Standards vary a lot depending on where you are. Lower villages like Phidim and Sekhathum feel fairly comfortable. Rooms get more basic once you pass Ghunsa, though. Above that, expect simple wooden rooms and shared toilets. Places like Lhonak have very limited facilities overall.
Dal bhat is the most reliable option almost everywhere. You will also find noodles, potatoes, eggs, and simple soups. Meat does appear on some menus lower down the trail. It's generally safer to stick with vegetarian food, though. Menus shrink considerably the higher up you go.
Barely, and it disappears completely for long stretches. Some lower teahouses offer paid Wi-Fi, though it's unreliable. Most of the time, the signal drops out almost entirely past Sekhathum. This is genuinely one of Nepal's most disconnected trekking regions. Worth telling people back home you will be offline for a while.
Yes, but mostly only in the lower sections. Some teahouses charge a small fee for hot water. Above Ghunsa, hot showers become rare or unavailable entirely. Wet wipes end up doing most of the work higher up. It's worth mentally preparing for that shift in comfort.
The cost varies by teahouse and altitude. Lower down, charging is sometimes free or cheap. Above Ghunsa, expect a per-hour charging fee instead. A power bank genuinely earns its weight on this trek. Solar charging is limited and unreliable at higher elevations too.
No, not without treating it first properly. Boiled water is available at most teahouses for a fee. Bringing purification tablets or a filter is the smarter option. It also saves you money over three weeks on the trail. Avoid untreated stream water, however clean it might look.
Cost, Money & Transport
Pricing runs between USD 2,000 and 2,200 per person. It depends mostly on your group size overall. Smaller groups usually pay a bit more each. Larger groups bring the per-person cost down slightly. Exact pricing can be confirmed by Radiant Treks on your dates.
Permits, guides, porters, and teahouse meals are covered. Kathmandu hotel nights and airport transfers are included too. Domestic flights and jeep transfers to the trailhead count as well. Basically, the core logistics are sorted before you arrive. Personal spending and extras aren't included in the package, though.
International flights and your Nepal visa are not included. Travel insurance is required but arranged separately by you. Personal expenses for gear, snacks, and drinks on the trail cost extra. Tips for your guide and porter aren't included either. Hot showers and charging fees also fall outside the package.
A reasonable amount to bring is somewhere around NPR 25,000 to 35,000. There are no ATMs at all once you leave Kathmandu. This covers charging fees, extra snacks, and hot water. It also covers tips for your guide and porter. Bringing a bit more than you think never really hurts.
No, there aren't any once you leave Bhadrapur. Bhadrapur has limited banking options at best. Past that point, cash is genuinely all you have. Withdraw everything you will need before flying out. Running short on cash mid-trek isn't something you want to deal with.
You fly from Kathmandu to Bhadrapur first. From there, it's a long jeep ride toward Sekhathum. The drive typically takes two full days total. Road conditions get rougher the closer you get. Radiant Treks arranges private jeep transport for this whole stretch.
Guides & Porters
This is a restricted area, so it's a legal requirement. Permits simply can't be issued without a licensed guide attached. Beyond the paperwork, though, it genuinely makes sense here too. The route is remote, and conditions change fast at altitude. A good guide reads all of that for you.
It's not mandatory, but most trekkers choose to anyway. Carrying your own gear for 18 days is genuinely tough. One porter is usually shared between two trekkers if you hire. Most trekkers find that having a porter makes the whole trek much easier.
Typically around 20 to 25 kg per porter. That's usually split as roughly 12-13 kg per trekker. Anything heavier than that isn't fair to your porter. It's worth packing sensibly with that limit in mind. Your duffel bag weight really does matter on this trek.
There are no strict rules. But there are general norms. A common range is USD 10-15 per day for guides. Porters usually receive somewhat less, around USD 6-8 per day. Tips are given directly at the end of the trek.
Yes, solo and private guide arrangements are both available. Radiant Treks can build the trek around your own dates. You will still need a minimum of two people for permits. If you are alone, they pair your permit with another trekker. The trek itself can still run entirely as private.
Yes, all guides carry proper wilderness first aid training. They also carry a comprehensive first aid kit throughout. Recognizing the early symptoms of altitude sickness is a core part of their job. Guides immediately slow pace or descend if symptoms appear. This matters even more on a remote route like Kanchenjunga.
Safety & Altitude Sickness
A headache is usually the first thing you notice. Nausea and a bit of dizziness often follow soon after. You might feel more tired than the walking really justifies. Some people lose their appetite or struggle to sleep properly. These symptoms tend to show up above 3,000 meters here. Don't brush off mild symptoms just because they don't feel serious yet.
Many trekkers do, but it ultimately depends on you. Worth having a proper chat with your doctor before you fly out. It can help your body adjust to altitude a bit quicker. That said, it's not a replacement for pacing yourself properly. Your guide can help with timing once you're actually on the trail.
There's a dedicated rest day built in at Ghunsa for exactly this reason. Elevation gain is kept fairly gradual across most of the trek. Both base camps are done as day hikes, not overnight stays. That keeps your time at extreme altitude shorter than it would otherwise be. Honestly, the pacing matters more than most people expect going in.
Your guide monitors everyone as the days go on. Mild symptoms usually just mean resting or dropping down slightly in elevation. If things get serious, descending immediately isn't optional; it just happens. Evacuation gets arranged fast if the situation genuinely calls for it. This is really why solid travel insurance matters so much out here.
It is, though weather plays a big role in whether it can happen right away. Somewhere as remote as Pangpema makes things genuinely harder to coordinate. Your insurance needs to cover high-altitude evacuation specifically, not just general medical costs. Your guide handles the coordination if it comes to that. Even so, response time can shift depending on where you are and what the weather's doing.
This is about as remote as trekking in Nepal gets, honestly. Once you are past Sekhathum, there's no road access at all. Mobile signal comes and goes, and in places, it's just gone entirely. That's a big part of why the guide requirement isn't just a formality here. Preparation and proper insurance are more important on this route than on most others.
It happens occasionally, and it's not a big issue. Your guide makes the final call based on safety. The rest of the itinerary continues as planned regardless. There's no partial refund tied to skipping one hike. Safety always comes before making every single stop.
Skip untreated water, no matter how clean the stream looks. Boiled water from teahouses is usually safe to drink. Still, it's smart to carry purification tablets or a filter of your own. Steer clear of raw vegetables and unpeeled fruit where you can. Basic hygiene habits really help once you are at altitude.
Yes, it's still worth putting one together yourself. Your guide's kit is really there for bigger, group-level emergencies. Your kit should handle the smaller, everyday stuff instead. Think blister care, your own medication, and basic pain relief. That way, you're not digging through the group kit for something minor.
Culture, Nature & Responsible Travel
Mostly Limbu, Rai, and Sherpa communities along the route. Lower villages tend to have more Limbu and Rai influence. Higher up, near Ghunsa, Tibetan Buddhist culture becomes more visible. You will see such elements in monasteries, prayer flags, and daily village life. Each stretch of the trail feels culturally a bit different.
Red pandas and snow leopards both live in this region. Sightings are rare, though, given how shy these animals are. Musk deer and various pheasant species are more commonly spotted. The conservation area protects a genuinely wide range of biodiversity. Birdlife especially picks up in the lower forested sections.
Yes, the whole area falls under the Kanchenjunga Conservation Area. It's there to protect both the wildlife and these fragile high-altitude ecosystems. A good chunk of what you pay for permits actually goes back into conservation work here. Even something as simple as sticking to the marked trail helps more than you'd think. Over a full trekking season, all those small choices really do add up.
Try to skip single-use plastic where you can, and stick with the teahouses along the route. Bringing your own reusable bottle and purifying water yourself makes a real difference too. Around monasteries and religious sites especially, it's worth being mindful of local customs. And always ask before taking someone's photo, particularly in the smaller villages. Beyond that, just choosing to support local lodges and guides instead of cutting corners goes a long way.
It does, actually, pretty directly. The teahouses along the way are locally owned and run by the families living there. The same goes for guides and porters — all hired locally, not brought in from outside. Part of your permit fee also goes back into conservation and development funding for the region. Going with a local operator like Radiant Treks means that money stays in Nepal rather than leaving the country. For these remote mountain communities, tourism isn't just nice to have. It is genuinely how a lot of families get by.
Yes, particularly around Ghunsa and the villages near it. Monasteries and prayer flags appear at several points along the trail. Phale, a smaller village nearby, has a distinctly Tibetan character too. These sites aren't detours, really, just part of the walk itself. It's worth pausing to take them in rather than rushing past.
Trek Comparisons
Yes, in most practical ways, it really is. EBC usually runs 12 to 14 days total. This one stretches out to 23 days instead. You are also crossing higher, more remote terrain out here. There's no quick Lukla flight either, just long road transfers. Simply put, Kanchenjunga asks a lot more of you overall.
Both are long treks with genuinely varied scenery throughout. But Kanchenjunga feels noticeably more remote and less developed. Annapurna Circuit has better infrastructure and more frequent teahouses along the way. Trail conditions on Kanchenjunga stay pretty basic, especially past Ghunsa. If remoteness is what you are after, Kanchenjunga wins that one easily.
That shorter version only reaches Pangpema, the north side. This full circuit also adds Oktang and the south side. You will also cross Sele La, Sinion La, and Mirgin La passes here. Naturally, that adds both distance and days to the trip. If time's tight, the 16-day option is the more practical choice.
Honestly, it depends on what you are after. The Everest region gives you that iconic, close-up Everest view. Kanchenjunga offers a wider, less crowded, more untouched panorama instead. Both base camps here show genuinely different angles of the peak. It really comes down to crowds versus that classic, familiar view.
Yes, significantly so, and it's one of the biggest draws. You will see far fewer trekkers here than on EBC or Annapurna. Some days, you might not pass anyone else at all. That's largely down to the restricted permits and sheer remoteness. For people wanting solitude, this trek is genuinely one of Nepal's best options.
Essential Kanchenjunga Circuit Trek Packing List
Packing for the Kanchenjunga Circuit Trek isn’t about bringing everything you own — it’s about layering right and trusting the essentials. This is a longer, more remote route than most in Nepal, crossing above 5,000 meters twice, with almost no resupply options once you’re past Sekhathum. The goal is to stay warm, dry, and self-sufficient without turning your duffel into something your porter dreads picking up.
Here’s the full, practical packing list for your Kanchenjunga adventure.
Clothing
Layering does the real work on this trek. You’ll sweat through the lower forest sections near Amjilosa and Gyabla, then freeze the moment the sun dips behind the ridgeline at Ghunsa or Lhonak.
Base Layers (2-3 sets)
These sit against your skin and manage sweat before it turns cold.
- Thermal tops and bottoms: Merino wool or synthetic — both work well here.
- Moisture-wicking fabric only: Cotton holds sweat and gets miserable fast at altitude.
- A snug, breathable fit: You’ll wear these daily, so comfort matters over three weeks.
Mid Layers (2-3 sets)
Your insulation for the colder valley sections and unheated teahouse evenings.
- Fleece jackets or wool pullovers: Simple, reliable heat retention.
- A light insulated jacket: Warm without adding bulk to your pack.
- Easy on, easy off: You’ll be adding and shedding layers constantly on the passes.
Outer Shell Jacket and Trousers (1 set)
Your barrier against wind and sudden weather on exposed sections like Sele La and Mirgin La.
- Waterproof jacket and pants: The high passes see snow even outside of winter.
- Windproof fabric: The wind at Lhonak and Pangpema is relentless, even on clear days.
- A hooded design: Keeps your neck and head covered during exposed pass crossings.
Down Jackets (Heavy and Light)
Your main defense once you’re above Ghunsa.
- A heavy insulated down jacket (1): Necessary for Lhonak, Pangpema, and Oktang, where nights and early mornings drop well below freezing.
- A light down jacket (1): Useful in the lower, cooler sections and easy to stuff into your daypack when not needed.
Trekking Shirts and Pants
Your everyday trail wear.
- Trekking shirts (3-4 sets): A mix of long- and short-sleeve, quick-dry fabric.
- Trekking pants (2-3 pairs): Lightweight, stretchable, and ideally quick-drying for the wetter, forested lower days.
Head and Hands
Don’t underestimate how much heat you lose from your extremities on a trek this long.
- A warm beanie: Full ear coverage matters at Pangpema and Oktang.
- A sun hat or cap: The lower sections, especially around Phidim, get intense sun exposure.
- Gloves: A lightweight inner pair for general wear, plus a heavier waterproof/windproof pair for the passes and base camp hikes.
- A buff or neck gaiter (2 pieces): Useful for dust on the jeep ride to Sekhathum and cold wind on the higher trail.
Footwear
Your feet carry you for over three weeks here, so this is not the place to compromise.
- Trekking boots (1 pair): Waterproof, with strong ankle support for the loose moraine near Pangpema and Oktang. Break them in well before you arrive — new boots and 22 days don’t mix.
- Camp shoes or sandals (1 pair): Something light to let your feet recover at teahouses after long walking days.
- Trekking socks (5-6 pairs): Medium-thickness, moisture-wicking, to keep blisters at bay.
- Warm socks (2-3 pairs): Thick wool, kept strictly for sleeping at higher elevations.
- Gaiters: Genuinely useful if you’re trekking in shoulder season, when snow can linger on the higher passes.
Bags and Packs
A simple system works best: your porter carries the bulk, you carry what you need during the day.
- Duffel bag (80-100L): Tough and ideally waterproof, since it takes a beating on the long jeep rides to Sekhathum.
- Daypack (30-40L): Comfortable straps matter, since you’ll carry water, layers, snacks, and a camera in it daily.
- Rain covers: Sized for both your daypack and duffel, given how unpredictable weather gets past Ghunsa.
- Dry bags and ziplocks: Keep electronics, documents, and spare clothing dry through the wetter lower sections.
Sleeping Gear
Teahouse rooms above Ghunsa have no heating at all, and the temperature drop after dark is significant.
- Sleeping bag: A four-season down bag rated to at least -15°C to -20°C — colder than what most other Nepal treks require, given how high this route goes.
- Sleeping bag liner: Adds warmth and keeps things cleaner over three weeks of near-daily use.
Toiletries
Keep it light, basic, and biodegradable where you can.
- The essentials: Toilet paper (bring extra — there’s nowhere to buy more past Sekhathum) and wet wipes, which often double as your only wash at higher elevations.
- Hygiene: Toothbrush, toothpaste, small soap, hand sanitizer, and a quick-dry microfiber towel.
- Skin protection: High-SPF sunscreen, heavy-duty lip balm, and moisturizer, since the dry mountain air and glacier glare near Oktang and Pangpema can be harsh.
- Grooming: A small comb and nail clippers.
First Aid and Medication
Your guide carries a full kit, but you should always have your basics on hand.
- Altitude and pain relief: Diamox (if you choose to take it, ideally after discussing with a doctor beforehand), paracetamol, and ibuprofen for headaches and general aches.
- Stomach and cold: Rehydration salts, cold or cough medicine, and anti-diarrhea tablets.
- Wound care: Band-aids, blister plasters or tape, and antiseptic cream.
- Extras: Any personal prescriptions, and a small oximeter is genuinely worth carrying given how much time this route spends above 4,000 and 5,000 meters.
Hydration and Snacks
Staying properly hydrated is one of the simplest things you can do to help your body handle the altitude.
- Water storage: A reusable bottle or hydration bladder to drink 2-3 liters of water every day.
- Water purification: Tablets or a filter/UV method — boiled water isn’t guaranteed at every stop, especially near Lhonak and Pangpema.
- A thermos (optional): Worth carrying for hot water on the cold mornings before Pangpema and Oktang.
- Snacks: Energy bars, trail mix, dried fruit, and electrolyte powder, since teahouse menus narrow considerably above Ghunsa.
Accessories and Electronics
The small things end up mattering a lot over three weeks on the trail.
- Trekking poles: Genuinely useful on the steep, loose descents after Sinion La and Mirgin La.
- Headlamp: Essential for the early starts to Pangpema and Oktang and for moving around teahouses after dark. Bring spare batteries.
- Power and tech: A high-capacity power bank (20,000mAh or more) is essential, as charging becomes limited or only available by the hour above Ghunsa. Keep batteries close to your body or inside your sleeping bag overnight, since the cold drains them fast.
- Comfort items: Sunglasses with real UV protection (non-negotiable near the glaciers at Oktang and Pangpema), earplugs for thin teahouse walls, and a small pocket knife.
Documents and Cash
Keep these in a waterproof pouch inside your daypack at all times.
Must-Carry Documents
- Passport, valid for at least six months, plus a couple of photocopies.
- Trekking permits — the Kanchenjunga Conservation Area Permit and the Restricted Area Permit, usually arranged through Radiant Treks, but worth carrying copies of yourself.
- Passport-sized photos as they are necessary for getting permits and any local SIM card needs.
- Travel insurance papers, specifically mentioning high altitude trekking and emergency evacuation coverage under the policy.
Cash (NPR 25,000-35,000)
There are no ATMs at all once you leave Kathmandu, and none along the entire trekking route, so bring more cash than you think you’ll need, covering things like:
- Charging fees and occasional Wi-Fi access at teahouses.
- Extra snacks, boiled drinking water, and hot tea.
- Tips for your guide and porter at the end of the trek.
Real Stories from our TripAdvisor Page
Curious about what travelers say about Radiant Treks? Discover genuine experiences on our Reviews Page.
Kanchenjunga Circuit Trek Route Map


